สารบัญเนื้อหา
- จัดเก็บรูปภาพที่ไหนได้บ้างและควรเลือกใช้ที่ไหน
- การใช้งาน Cloudinary เพื่อจัดเก็บรูปภาพ
- สร้าง Photos Controller
- ทดสอบ Upload Photo ด้วย Postman
- สร้าง Photo Component เพื่อ Upload Photos จาก Angular 9
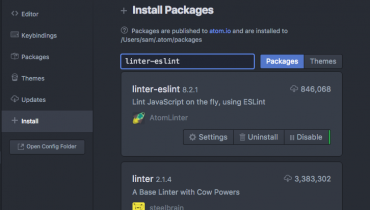
- ใช้งาน 3rd Party ช่วยในการอัพโหลด
- กำหนดภาพเป็นภาพโปรไฟล์จาก Photos
- เพิ่มการแสดงรูปภาพโปรไฟล์บนเมนู
- ใช้งาน Behavior Subject เพื่อสร้าง Component แบบสื่อสารหลายทิศทาง (any to any communication)
- การลบรูปภาพที่อัพโหลด
1. จัดเก็บรูปภาพที่ไหนได้บ้างและควรเลือกใช้ที่ไหน
เราสามารถอัพโหลดและจัดเก็บไฟล์หรือรูปภาพจากระบบที่ไหนได้บ้าง และเราควรใช้ที่ไหน ซึ่งก็มีอยู่ 3 ทางเลือก คือ
- Database
- File System
- Cloud
ถ้าเราจัดเก็บไฟล์ใน Database ก็สามารถทำได้ แต่จะทำให้ Database เราใหญ่และเพิ่มขึ้นอย่างรวดเร็วมาก วิธีการนี้จึงไม่ค่อยได้รับความนิยม เพราะเรื่องของประสิทธิภาพและอาการบวมของ Database
ถ้าจัดเก็บไฟล์ใน File System ก็สามารถทำได้ แต่ Server เราก็ต้องมีพื้นที่รองรับการจัดเก็บไฟล์เช่นเดียวกัน ซึ่งก็ตามมาด้วยภาระในการบริหารจัดการที่มากขึ้นด้วย ซึ่งในกรณีนี้เหมาะสำหรับใช้จัดเก็บไฟล์ในองค์ที่มีทรัพยากรของตนเองอยู่แล้ว และไม่ต้องการให้ข้อมูลถูกจัดเก็บอยู่นอกหน่วยงาน
ถ้าจัดเก็บไฟล์ใน Cloud ก็เป็นอีกหนึ่งทางเลือกที่ทำได้ ซึ่งแนวทางนี้เป็นที่ได้รับความนิยมสูงและมีประสิทธิภาพมากในปัจจุบัน เนื่องจากลดภาระของผู้ดูแลระบบไปส่วนหนึ่ง อีกทั้งไม่เปลือง Resource ด้วย แต่ถ้าใช้เยอะ ๆ ก็จะต้องมีค่าใช้จ่ายที่เพิ่มตามลำดับเช่นกัน ถือได้ว่าช่องทางนี้เหมาะสำหรับผู้ประกอบการรายย่อยและผู้ที่ต้องการประสิทธิภาพสูงแต่ไม่ต้องการรับภาระเอง
ในที่นี้จะใช้ Cloudinary ซึ่งเป็น Cloud เจ้าหนึ่งที่สามารถใช้ฟรีได้ในระยะเริ่มต้น ถ้าใช้ไม่เกินตามที่กำหนดก็ไม่ต้องเสียตังค์ รายละเอียดติดตามได้ที่ cloudinary.com

2. การใช้งาน Cloudinary เพื่อจัดเก็บรูปภาพ
ทำการสมัครและรับข้อมูลที่ต้องใช้ที่ https://cloudinary.com/users/register/free นำ CloudName, ApiKey และ ApiSecret มาจัดเก็บและเรียกใช้ใน API โดยกำหนดค่าไว้ที่ appsettings.json
{
  ...,
  "CloudinarySettings": {
    "CloudName": "isamrid",
    "ApiKey": "567962829459424",
    "ApiSecret": "p_NeFViCFiIXJTDZoleXzpAyt2M"
  }
}
สร้าง CloudinarySettings.cs ใน Helpers
namespace SocialApp_API.Helpers
{
    public class CloudinarySettings
    {
        public string CloudName { get; set; }
        public string ApiKey { get; set; }
        public string ApiSecret { get; set; }
    }
}
เพิ่ม Services ใน Startup.cs
services.Configure<CloudinarySettings>(Configuration.GetSection("CloudinarySettings"));เพิ่ม PublicId ใน Models Photo.cs
public string PublicId { get; set; }ทำการ Add Migrations และ Update Database
dotnet ef migrations add AddPublicId
dotnet ef database update
เพิ่ม Package CloudinaryDotNet
CloudinaryDotNet3. สร้าง Photos Controller
สร้าง PhotoForCreationDto
using System;
using Microsoft.AspNetCore.Http;

namespace SocialApp_API.Dtos
{
    public class PhotoForCreationDto
    {
        public string Url { get; set; }
        public IFormFile File { get; set; }
        public string Description { get; set; }
        public DateTime DateAdded { get; set; }
        public string PublicId { get; set; }
        public PhotoForCreationDto()
        {
            DateAdded = DateTime.Now;
        }
    }
}
สร้าง Controller PhotosController.cs
using System.Linq;
using System.Security.Claims;
using System.Threading.Tasks;
using AutoMapper;
using CloudinaryDotNet;
using CloudinaryDotNet.Actions;
using Microsoft.AspNetCore.Authorization;
using Microsoft.AspNetCore.Mvc;
using Microsoft.Extensions.Options;
using SocialApp_API.Data;
using SocialApp_API.Dtos;
using SocialApp_API.Helpers;
using SocialApp_API.Models;

namespace SocialApp_API.Controllers
{
    [Authorize]
    [Route("api/users/{userId}/photos")]
    [ApiController]
    public class PhotosController : ControllerBase
    {
        private readonly ISocialRepository _repo;
        private readonly IMapper _mapper;
        private readonly IOptions<CloudinarySettings> _cloudinaryConfig;
        private Cloudinary _cloudinary;
        public PhotosController(ISocialRepository repo, IMapper mapper, IOptions<CloudinarySettings> cloudinaryConfig)
        {
            _cloudinaryConfig = cloudinaryConfig;
            _mapper = mapper;
            _repo = repo;

            Account acc = new Account(
                _cloudinaryConfig.Value.CloudName,
                _cloudinaryConfig.Value.ApiKey,
                _cloudinaryConfig.Value.ApiSecret
            );

            _cloudinary = new Cloudinary(acc);
        }

        [HttpPost]
        public async Task<IActionResult> AddPhotoForUser(int userId, [FromForm]PhotoForCreationDto photoForCreationDto)
        {
            if (id != int.Parse(User.FindFirst(ClaimTypes.NameIdentifier).Value))
                return Unauthorized();

            var userFromRepo = await _repo.GetUser(userId);

            var file = photoForCreationDto.File;
            var uploadResult = new ImageUploadResult();
            if (file.Length > 0)
            {
                using (var stream = file.OpenReadStream())
                {
                    var uploadParams = new ImageUploadParams()
                    {
                        File = new FileDescription(file.Name, stream),
                        Transformation = new Transformation()
                            .Width(500).Height(500).Crop("fill").Gravity("face")
                    };

                    uploadResult = _cloudinary.Upload(uploadParams);
                }
            }

            photoForCreationDto.Url = uploadResult.Url.ToString();
            photoForCreationDto.PublicId = uploadResult.PublicId;

            var photo = _mapper.Map<Photo>(photoForCreationDto);

            if (!userFromRepo.Photos.Any(u => u.isMain))
                photo.isMain = true;

            userFromRepo.Photos.Add(photo);

            if (await _repo.SaveAll())
            {
                return Ok();
            }

            return BadRequest("Cloud not add the photo");

        }
    }
}
เพิ่ม PhotoForReturnDto.cs
using System;

namespace SocialApp_API.Dtos
{
    public class PhotoForReturnDto
    {
        public int Id { get; set; }
        public string Url { get; set; }
        public string Description { get; set; }
        public DateTime DateAdded { get; set; }
        public bool isMain { get; set; }
        public string PublicId { get; set; }
    }
}
สร้าง Auto Mapper ใน AutoMapperProfiles.cs
CreateMap<Photo, PhotoForReturnDto>();
CreateMap<PhotoForCreationDto, Photo>();
เพิ่ม GetPhoto ใน ISocialRepository.cs
Task<Photo> GetPhoto(int id);ทำการ implement interface ใน SocialRepository.cs
public async Task<Photo> GetPhoto(int id)
{
    var photo = await _context.Photos.FirstOrDefaultAsync(p => p.Id == id);

    return photo;
}
เพิ่ม GetPhoto() ใน PhotosControllers.cs
[HttpGet("{id}", Name = "GetPhoto")]
public async Task<IActionResult> GetPhoto(int id)
{
    var photoFromRepo = await _repo.GetPhoto(id);

    var photo = _mapper.Map<PhotoForReturnDto>(photoFromRepo);

    return Ok(photo);
}
ปรับปรุง AddPhotoForUser() ใน PhotosControllers.cs
if (await _repo.SaveAll())
{
    var photoToReturn = _mapper.Map<PhotoForReturnDto>(photo);
    return CreatedAtRoute("GetPhoto", new { userId = userId, id = photo.Id }, photoToReturn);
}
using System.Linq;
using System.Security.Claims;
using System.Threading.Tasks;
using AutoMapper;
using CloudinaryDotNet;
using CloudinaryDotNet.Actions;
using Microsoft.AspNetCore.Authorization;
using Microsoft.AspNetCore.Mvc;
using Microsoft.Extensions.Options;
using SocialApp_API.Data;
using SocialApp_API.Dtos;
using SocialApp_API.Helpers;
using SocialApp_API.Models;
namespace SocialApp_API.Controllers
{
[Authorize]
[Route("api/users/{userId}/photos")]
[ApiController]
public class PhotosController : ControllerBase
{
private readonly ISocialRepository _repo;
private readonly IMapper _mapper;
private readonly IOptions<CloudinarySettings> _cloudinaryConfig;
private Cloudinary _cloudinary;
public PhotosController(ISocialRepository repo, IMapper mapper, IOptions<CloudinarySettings> cloudinaryConfig)
{
_cloudinaryConfig = cloudinaryConfig;
_mapper = mapper;
_repo = repo;
Account acc = new Account(
_cloudinaryConfig.Value.CloudName,
_cloudinaryConfig.Value.ApiKey,
_cloudinaryConfig.Value.ApiSecret
);
_cloudinary = new Cloudinary(acc);
}
[HttpGet("{id}", Name = "GetPhoto")]
public async Task<IActionResult> GetPhoto(int id)
{
var photoFromRepo = await _repo.GetPhoto(id);
var photo = _mapper.Map<PhotoForReturnDto>(photoFromRepo);
return Ok(photo);
}
[HttpPost]
public async Task<IActionResult> AddPhotoForUser(int userId, [FromForm]PhotoForCreationDto photoForCreationDto)
{
if (userId != int.Parse(User.FindFirst(ClaimTypes.NameIdentifier).Value))
return Unauthorized();
var userFromRepo = await _repo.GetUser(userId);
var file = photoForCreationDto.File;
var uploadResult = new ImageUploadResult();
if (file.Length > 0)
{
using (var stream = file.OpenReadStream())
{
var uploadParams = new ImageUploadParams()
{
File = new FileDescription(file.Name, stream),
Transformation = new Transformation()
.Width(500).Height(500).Crop("fill").Gravity("face")
};
uploadResult = _cloudinary.Upload(uploadParams);
}
}
photoForCreationDto.Url = uploadResult.Url.ToString();
photoForCreationDto.PublicId = uploadResult.PublicId;
var photo = _mapper.Map<Photo>(photoForCreationDto);
if (!userFromRepo.Photos.Any(u => u.isMain))
photo.isMain = true;
userFromRepo.Photos.Add(photo);
if (await _repo.SaveAll())
{
var photoToReturn = _mapper.Map<PhotoForReturnDto>(photo);
return CreatedAtRoute("GetPhoto", new { userId = userId, id = photo.Id }, photoToReturn);
}
return BadRequest("Cloud not add the photo");
}
}
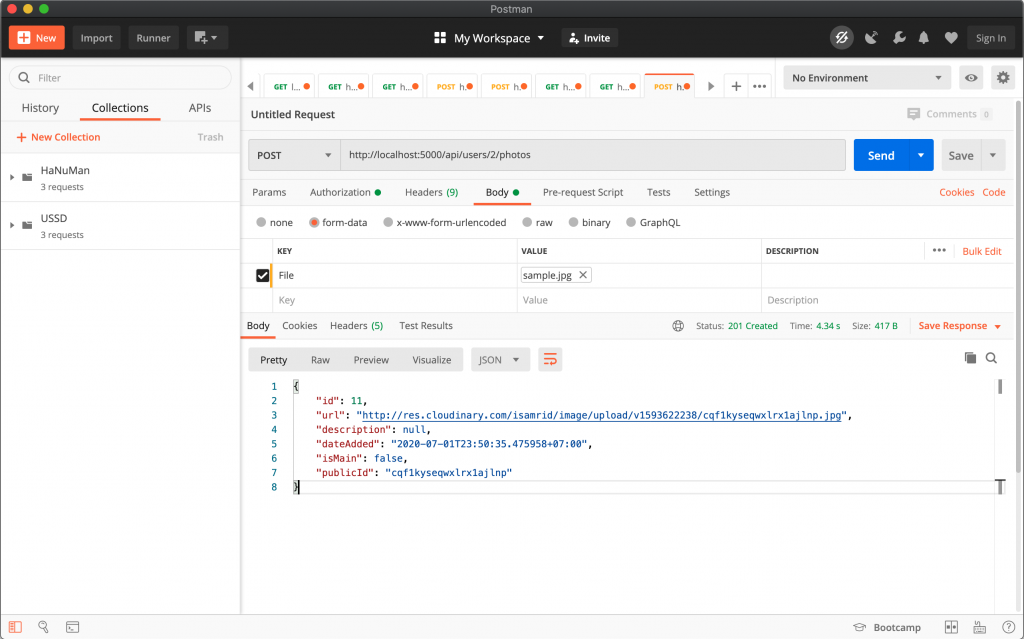
}4. ทดสอบ Upload Photo ด้วย Postman
ทดสอบ Upload Photo ไปที่ http://localhost:5000/api/users/1/photos
ใส่ Token ให้เรียบร้อย
ใส่ Body เป็น form-data -> File (File) -> เลือกไฟลภาพ แล้วกด Send
5. สร้าง Photo Component เพื่อ Upload Photos จาก Angular 9
สร้าง Photo.cs ใน _model
export interface Photo {
    id: number;
    url: string;
    description: string;
    dateAdded: Date;
    isMain: boolean;
}
สร้าง Component photo-editor ใน Members แล้วทำการ imports
photo-editor.component.ts
import { Component, OnInit, Input } from '@angular/core';
import { Photo } from 'src/app/_models/photo';

@Component({
  selector: 'app-photo-editor',
  templateUrl: './photo-editor.component.html',
  styleUrls: ['./photo-editor.component.css']
})
export class PhotoEditorComponent implements OnInit {
  @Input() photos: Photo[];

  constructor() { }

  ngOnInit() {
  }

}
photo-editor.component.html
<div class="row">
  <div class="col-sm-2" *ngFor="let photo of photos">
    <img src="{{photo.url}}" class="img-thumbnail p-1">
    <div class="text-center">
      <button type="button" class="btn btn-sm">Main</button>
      <button type="button" class="btn btn-sm btn-danger"><i class="fa fa-trash-o"></i></button>
    </div>
  </div>
</div>
photo-editor.component.css
.img.img-thumbnail {
    height: 100px;
    min-width: 100px !important;
    margin-bottom: 2px;
}
ใช้งาน photo-editor component ใน member-edit component ในส่วนของการแก้ไขรูปภาพ
<app-photo-editor [photos]="user.photos"></app-photo-editor>
6. ใช้งาน 3rd Party ช่วยในการอัพโหลด
ติดตั้ง package ng2-file-upload เพื่อช่วยในการอัพโหลดไฟล์
npm install ng2-file-upload --saveimport FileUploadModule ใน app.module.ts
import { FileUploadModule } from 'ng2-file-upload';Initial file upload ใน photo-editor.component.ts
import { Component, OnInit, Input } from '@angular/core';
import { FileUploader } from 'ng2-file-upload';
import { Photo } from 'src/app/_models/photo';
import { environment } from '../../../environments/environment';
import { AuthService } from 'src/app/_services/auth.service';

@Component({
  selector: 'app-photo-editor',
  templateUrl: './photo-editor.component.html',
  styleUrls: ['./photo-editor.component.css']
})
export class PhotoEditorComponent implements OnInit {
  @Input() photos: Photo[];
  uploader: FileUploader;
  hasBaseDropZoneOver: false;
  baseUrl = environment.apiUrl;

  constructor(private authService: AuthService) { }

  ngOnInit() {
    this.initializeUpload();
  }

  fileOverBase(e: any): void {
    this.hasBaseDropZoneOver = e;
  }

  initializeUpload() {
    this.uploader = new FileUploader({
      url: this.baseUrl + 'users/' + this.authService.decodeToken.nameid + '/photos',
      authToken: 'Bearer ' + localStorage.getItem('token'),
      isHTML5: true,
      allowedFileType: ['image'],
      removeAfterUpload: true,
      autoUpload: false,
      maxFileSize: 10 * 1024 * 1024
    });

    this.uploader.onAfterAddingFile = (file) => { file.withCredentials = false; };

    this.uploader.onSuccessItem = (item, response, status, headers) => {
      if (response) {
        const res: Photo = JSON.parse(response);
        const photo = {
          id: res.id,
          url: res.url,
          dateAdded: res.dateAdded,
          description: res.description,
          isMain: res.isMain
        };
        this.photos.push(photo);
      }
    };

  }

}
สร้าง interface สำหรับการอัพโหลดไฟล์ใน photo-editor.component.html
<div class="row">
  <div class="col-sm-2" *ngFor="let photo of photos">
    <img src="{{photo.url}}" class="img-thumbnail p-1">
    <div class="text-center">
      <button type="button" class="btn btn-sm">Main</button>
      <button type="button" class="btn btn-sm btn-danger"><i class="fa fa-trash-o"></i></button>
    </div>
  </div>
</div>

<div class="row mt-3">

  <div class="col-md-3">

      <h3>Add Photos</h3>

      <div ng2FileDrop
           [ngClass]="{'nv-file-over': hasBaseDropZoneOver}"
           (fileOver)="fileOverBase($event)"
           [uploader]="uploader"
           class="card bg-faded p-3 text-center mb-3 my-drop-zone">
           <i class="fa fa-upload fa-3x"></i>
          Drop Photos Here
      </div>

      Multiple
      <input type="file" ng2FileSelect [uploader]="uploader" multiple  /><br/>

      Single
      <input type="file" ng2FileSelect [uploader]="uploader" />
  </div>

  <div class="col-md-9" style="margin-bottom: 40px" *ngIf="uploader?.queue?.length">

      <h3>Upload queue</h3>
      <p>Queue length: {{ uploader?.queue?.length }}</p>

      <table class="table">
          <thead>
          <tr>
              <th width="50%">Name</th>
              <th>Size</th>
          </tr>
          </thead>
          <tbody>
          <tr *ngFor="let item of uploader.queue">
              <td><strong>{{ item?.file?.name }}</strong></td>
              <td *ngIf="uploader.options.isHTML5" nowrap>{{ item?.file?.size/1024/1024 | number:'.2' }} MB</td>
          </tr>
          </tbody>
      </table>

      <div>
          <div>
              Queue progress:
              <div class="progress mb-4">
                  <div class="progress-bar" role="progressbar" [ngStyle]="{ 'width': uploader.progress + '%' }"></div>
              </div>
          </div>
          <button type="button" class="btn btn-success btn-s"
                  (click)="uploader.uploadAll()" [disabled]="!uploader.getNotUploadedItems().length">
              <span class="fa fa-upload"></span> Upload
          </button>
          <button type="button" class="btn btn-warning btn-s"
                  (click)="uploader.cancelAll()" [disabled]="!uploader.isUploading">
              <span class="fa fa-ban"></span> Cancel
          </button>
          <button type="button" class="btn btn-danger btn-s"
                  (click)="uploader.clearQueue()" [disabled]="!uploader.queue.length">
              <span class="fa fa-trash"></span> Remove
          </button>
      </div>

  </div>

</div>
photo-editor.component.css
.img.img-thumbnail {
height: 100px;
min-width: 100px !important;
margin-bottom: 2px;
}
.nv-file-over {
border: dotted 3px red;
}
input[type=file] {
color: transparent;
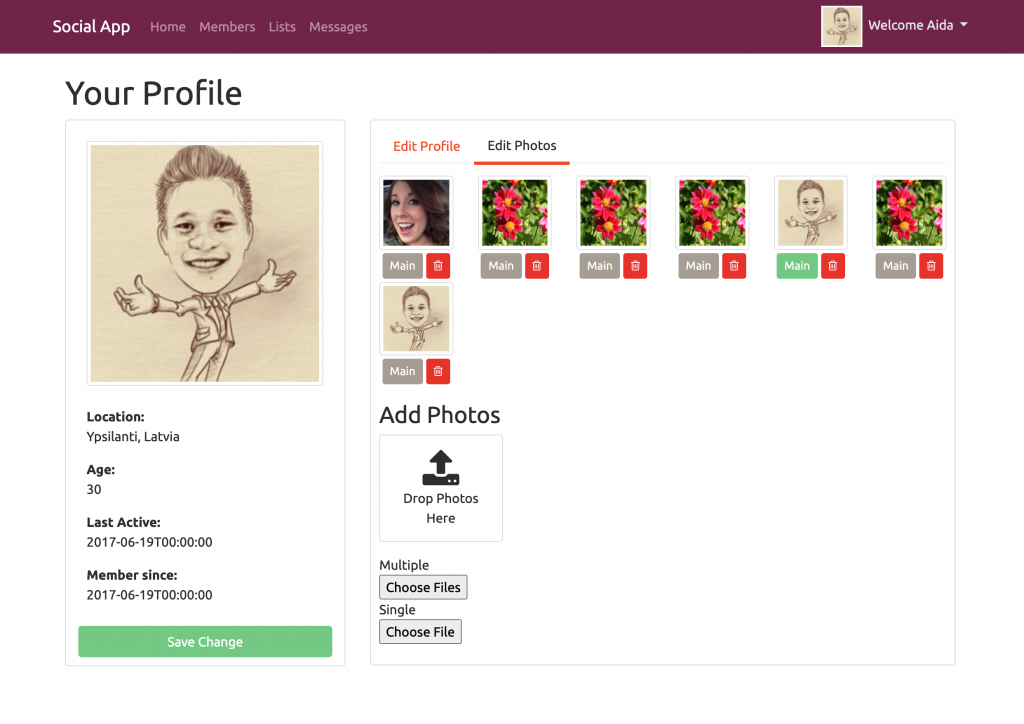
}ทดสอบรันและลองอัพโหลดภาพ
ถ้าพบว่ามี error เกิดขึ้นเกี่ยวกับ CORs อย่าลืมเพิ่มโค้ด
this.uploader.onAfterAddingFile = (file) => { file.withCredentials = false; };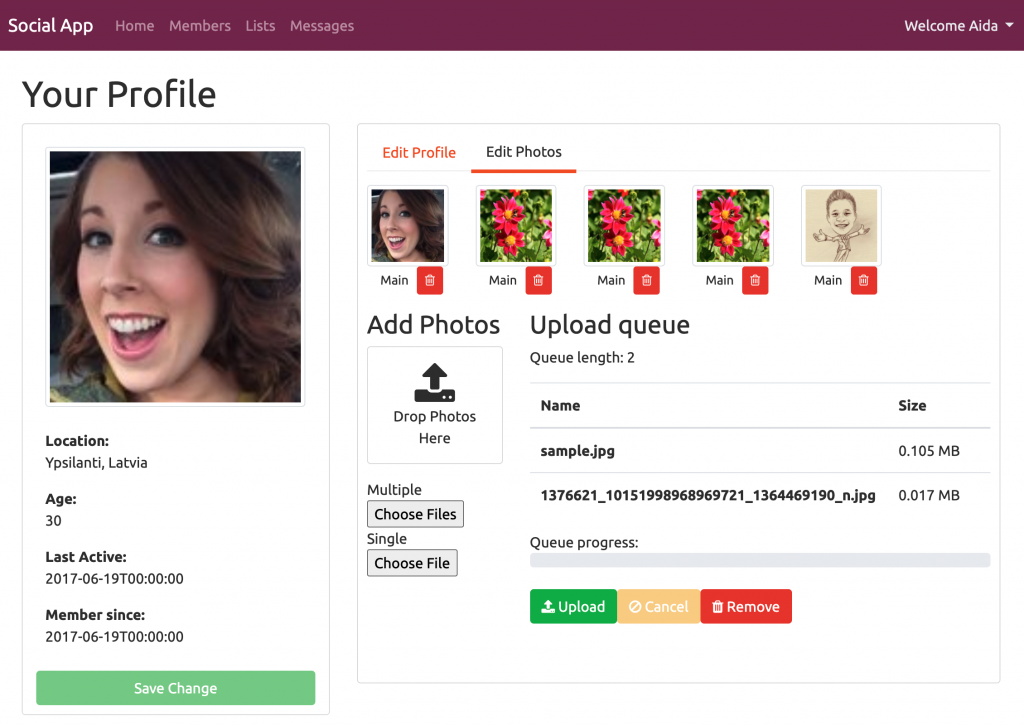
7. กำหนดภาพเป็นภาพโปรไฟล์จาก Photos
สร้าง Interface GetMainPhotoForUser ใน ISocialRepository.cs
Task<Photo> GetMainPhotoForUser(int userId);ทำการ Implement Interface GetMainPhotoForUser ใน SocialRepository.cs
public async Task<Photo> GetMainPhotoForUser(int userId)
{
    return await _context.Photos.Where(u => u.UserId == userId)
        .FirstOrDefaultAsync(p => p.isMain);
}
สร้าง Method SetMainPhoto ใน PhotoController.cs
[HttpPost("{id}/setMain")]
public async Task<IActionResult> SetMainPhoto(int userId, int id)
{
    if (userId != int.Parse(User.FindFirst(ClaimTypes.NameIdentifier).Value))
        return Unauthorized();

    var user = await _repo.GetUser(userId);

    if (!user.Photos.Any(p => p.Id == id))
        return Unauthorized();

    var photoFromRepo = await _repo.GetPhoto(id);

    if (photoFromRepo.isMain)
        return BadRequest("This is already the main photo");

    var currentMainPhoto = await _repo.GetMainPhotoForUser(userId);
    currentMainPhoto.isMain = false;

    photoFromRepo.isMain = true;

    if (await _repo.SaveAll())
        return NoContent();

    return BadRequest("Cloud not set photo to main");
}
เพิ่ม Service ใน user.service.ts
setMainPhoto(userId: number, id: number) {
  return this.http.post(this.baseUrl + 'users/' + userId + '/photos/' + id + '/setMain', {});
}
เพิ่มฟังก์ชัน setMainPhoto ใน photo-editor.component.ts
import { Component, OnInit, Input } from '@angular/core';
import { FileUploader } from 'ng2-file-upload';
import { Photo } from 'src/app/_models/photo';
import { environment } from '../../../environments/environment';
import { AuthService } from 'src/app/_services/auth.service';
import { UserService } from 'src/app/_services/user.service';
import { AlertifyService } from 'src/app/_services/alertify.service';
@Component({
selector: 'app-photo-editor',
templateUrl: './photo-editor.component.html',
styleUrls: ['./photo-editor.component.css']
})
export class PhotoEditorComponent implements OnInit {
@Input() photos: Photo[];
uploader: FileUploader;
hasBaseDropZoneOver: false;
baseUrl = environment.apiUrl;
currentMain: Photo;
constructor(private authService: AuthService, private userService: UserService, private alertify: AlertifyService) { }
ngOnInit() {
this.initializeUpload();
}
fileOverBase(e: any): void {
this.hasBaseDropZoneOver = e;
}
initializeUpload() {
this.uploader = new FileUploader({
url: this.baseUrl + 'users/' + this.authService.decodeToken.nameid + '/photos',
authToken: 'Bearer ' + localStorage.getItem('token'),
isHTML5: true,
allowedFileType: ['image'],
removeAfterUpload: true,
autoUpload: false,
maxFileSize: 10 * 1024 * 1024
});
this.uploader.onAfterAddingFile = (file) => { file.withCredentials = false; };
this.uploader.onSuccessItem = (item, response, status, headers) => {
if (response) {
const res: Photo = JSON.parse(response);
const photo = {
id: res.id,
url: res.url,
dateAdded: res.dateAdded,
description: res.description,
isMain: res.isMain
};
this.photos.push(photo);
}
};
}
setMainPhoto(photo: Photo) {
this.userService.setMainPhoto(this.authService.decodeToken.nameid, photo.id).subscribe(() => {
this.currentMain = this.photos.filter(p => p.isMain === true)[0];
this.currentMain.isMain = false;
photo.isMain = true;
}, error => {
this.alertify.error(error);
});
}
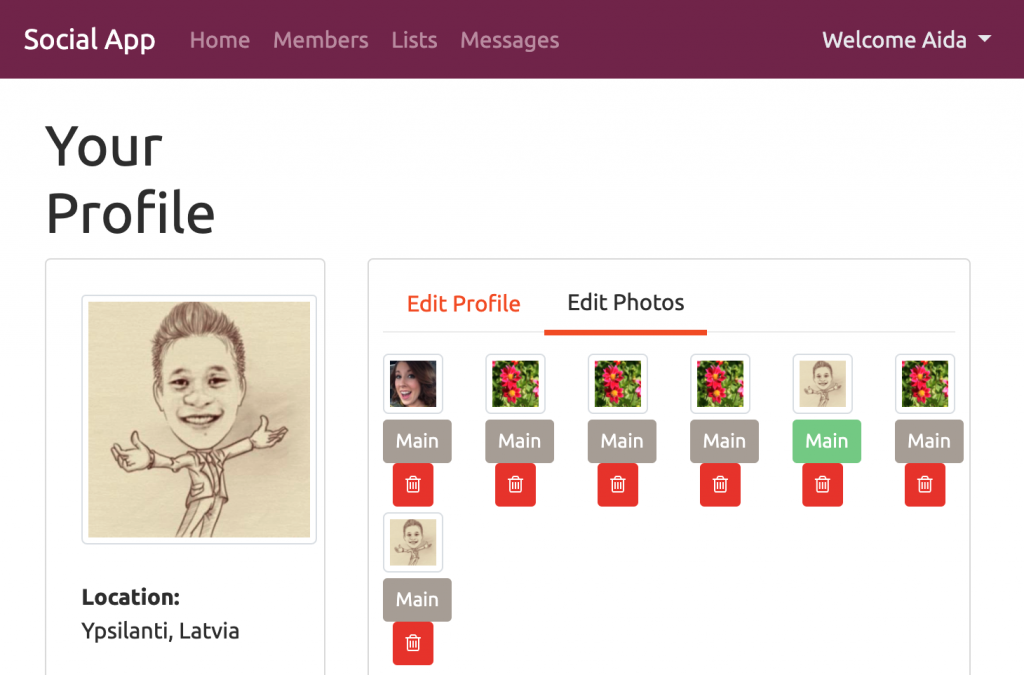
}ปรับปรุงปุ่ม Main ใน photo-editor.component.html
<div class="text-center mt-1 mb-1">
<button type="button" class="btn btn-sm mr-1"
(click)="setMainPhoto(photo)"
[ngClass]="photo.isMain ? 'btn-success active' : 'btn-secondary'"
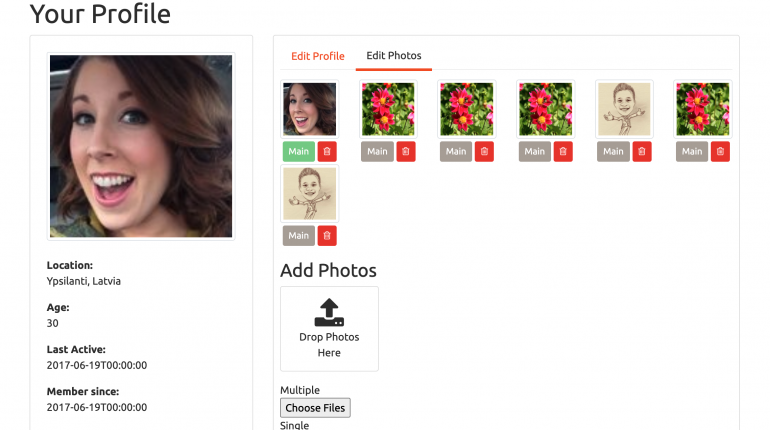
[disabled]="photo.isMain">Main</button>ทดสอบรัน และกำหนดภาพเป็นภาพโปรไฟล์ และลอง Refresh ดูผลการเปลี่ยนแปลง จะเห็นว่าภาพโปรไฟล์เปลี่ยนแล้ว แต่ยังไม่เปลี่ยนทันทีจนกว่าเราจะ Refresh
ทำการเพิ่ม Output ใน photo-editor.component.ts เพื่อส่งออกไปยัง photo-edit.component
@Output() getMemberPhotoChange = new EventEmitter<string>();เพิ่มการส่งค่า Output ใน setMainPhoto
setMainPhoto(photo: Photo) {
  this.userService.setMainPhoto(this.authService.decodeToken.nameid, photo.id).subscribe(() => {
    this.currentMain = this.photos.filter(p => p.isMain === true)[0];
    this.currentMain.isMain = false;
    photo.isMain = true;
    this.getMemberPhotoChange.emit(photo.url);
  }, error => {
    this.alertify.error(error);
  });
}
เพิ่มการรับค่า Output ใน app-photo-editor ใน member-edit.component.html
<app-photo-editor [photos]="user.photos" (getMemberPhotoChange)="updateMainPhoto($event)"></app-photo-editor>เพิ่มฟังก์ชันการอัพเดตภาพโปรไฟล์ใน member-edit.component.ts
updateMainPhoto(photoUrl) {
  this.user.photoUrl = photoUrl;
}
ลองรันและทดสอบ คราวนี้ภาพโปรไฟล์จะเปลี่ยยนทันทีแล้ว
8. เพิ่มการแสดงรูปภาพโปรไฟล์บนเมนู
ก่อนที่จะนำรูปภาพโปรไฟล์มาแสดงบนเมนูได้ จะต้องมีข้อมูลของ user ที่กำลัง login ก่อน แต่ตอนนี้เรายังไม่มีข้อมูลชุดที่จะสามารถเรียกได้ตลอดเวลา เราจึงต้องทำการสร้างชุดข้อมูลของ user ที่ login โดยจัดเก็บไว้ที่ localStorage
ในส่วนของ API เพิ่มการส่งข้อมูล user จากการ login
เพิ่มการจัดเก็บข้อมูล user ที่ login ใน localStorage ใน LoginController.cs ใน Method Login
var user = _mapper.Map<UserForListDto>(userFromRepo);

return Ok(new
{
    token = tokenHandler.WriteToken(token),
    user
});
แก้ไข Login() ใน AuthRepository.cs เพื่อให้ได้ url ของ photo ของ user นั้น ๆ
var user = await _context.Users.Include(p => p.Photos).FirstOrDefaultAsync(x => x.Username == username);ในส่วนของ Client เพิ่มการจัดเก็บข้อมูล user ใน localStorage
เพิ่มการจัดเก็บ user ใน localStorage ที่ login ของ auth.service.ts
login(model: any) {
  return this.http.post(this.baseUrl + 'login', model).pipe(
    map((response: any) => {
      const user = response;
      if (user) {
        localStorage.setItem('token', user.token);
        localStorage.setItem('user', JSON.stringify(user.user));
        this.decodeToken = this.jwtHelper.decodeToken(user.token);
        this.currentUser = user.user;
      }
    })
  );
}
เพิ่มการดึงข้อมูล user ใน onInit ใน app.module.ts
ngOnInit() {
  const token = localStorage.getItem('token');
  const user: User = JSON.parse(localStorage.getItem('user'));
  if (token) {
    this.authService.decodeToken = this.jwtHelper.decodeToken(token);
  }

  if (user) {
    this.authService.currentUser = user;
  }
}
เพิ่มการเคลียร์ข้อมูลใน logout() ใน auth.service.ts
logout() {
  localStorage.removeItem('token');
  localStorage.removeItem('user');
  this.authService.decodeToken = null;
  this.authService.currentUser = null;
  this.alertify.message('Logged out');
  this.router.navigate(['/home']);
}
ทดลองรัน
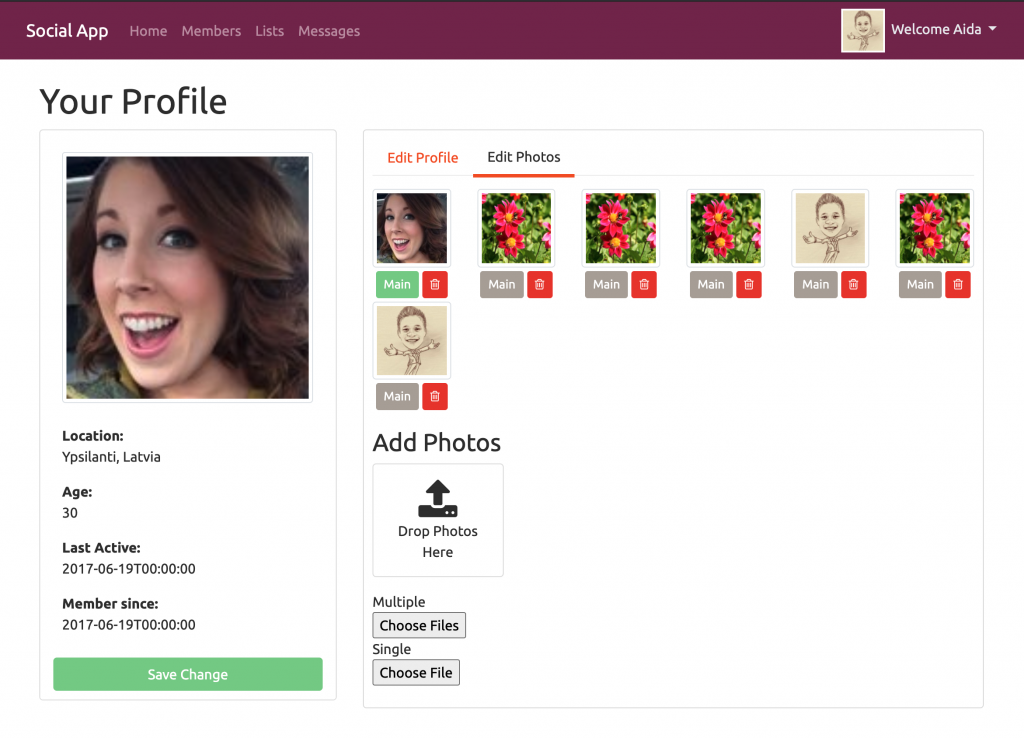
แต่เมื่อลองเปลี่ยนภาพโปรไฟล์จะยังพบว่าภาพบนเมนูยังไม่เปลี่ยนตาม
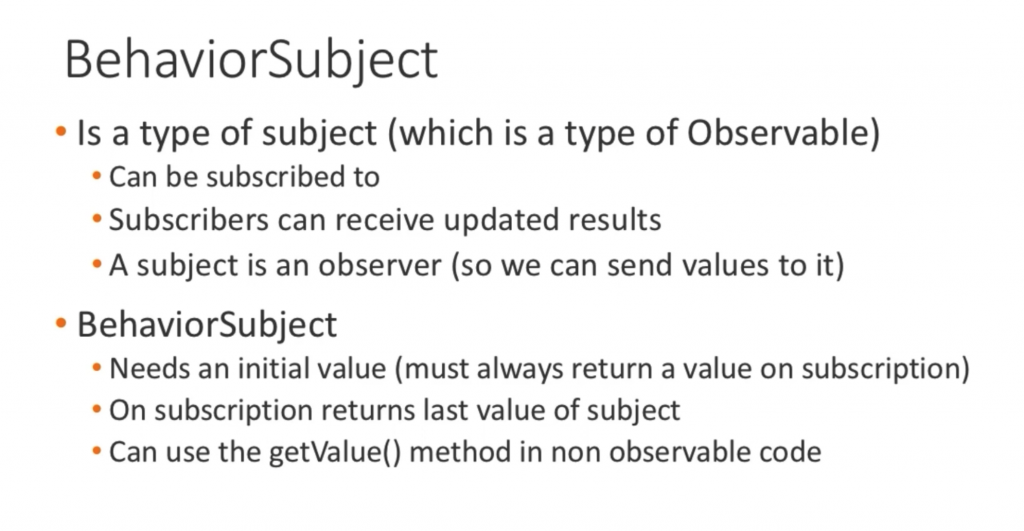
9. ใช้งาน Behavior Subject เพื่อสร้าง Component แบบสื่อสารหลายทิศทาง (any to any communication)
import BehaviorSubject ใน auth.service.ts
import { BehaviorSubject } from 'rxjs';เพิ่ม variable
photoUrl = new BehaviorSubject<string>('../../assets/user.png');
currentPhotoUrl = this.photoUrl.asObservable();
เพิ่ม changeMemberPhoto()
changeMemberPhoto(photoUrl: string) {
  this.photoUrl.next(photoUrl);
}
เรียกใช้ changeMemberPhoto() ใน login()
this.changeMemberPhoto(this.currentUser.photoUrl);เพิ่ม variable ใน nav.component.ts
photoUrl: string;เรียกใช้ค่าจาก currentPhotoUrl ใน onInit()
this.authService.currentPhotoUrl.subscribe(photoUrl => this.photoUrl = photoUrl);เปลี่ยนค่าการแสดงภาพในเมนูจาก
<img src="{{authService.currentUser.photoUrl}}"/>เป็น
<img src="{{photoUrl}}"/>เพิ่มการเปลี่ยนค่า currentPhotoUrl โดยเรียกใช้ changeMemberPhoto() ใน app.component.ts
import { Component, OnInit } from '@angular/core';
import { JwtHelperService } from '@auth0/angular-jwt';
import { AuthService } from './_services/auth.service';
import { User } from './_models/user';

@Component({
  selector: 'app-root',
  templateUrl: './app.component.html',
  styleUrls: ['./app.component.css']
})
export class AppComponent implements OnInit {
  jwtHelper = new JwtHelperService();

  constructor(private authService: AuthService){}

  ngOnInit() {
    const token = localStorage.getItem('token');
    const user: User = JSON.parse(localStorage.getItem('user'));
    if (token) {
      this.authService.decodeToken = this.jwtHelper.decodeToken(token);
    }

    if (user) {
      this.authService.currentUser = user;
      this.authService.changeMemberPhoto(user.photoUrl);
    }
  }
}
เพิ่ม var ใน member-edit.component.ts
photoUrl: string;เพิ่มการเรียกใช้ photoUrl ใน onInit ใน member-edit.component.ts
this.authService.currentPhotoUrl.subscribe(photoUrl => this.photoUrl = photoUrl);เรียกใช้ photoUrl ใหม่ ใน member-edit.component.html
<img src="{{photoUrl}}" alt="{{user.knownAs}}" class="card-img-top img-thumbnail">เพิ่มการ set ค่า photoUrl ใน setMainPhoto() ใน member-editor.component.ts และยกเลิกการใช้ Output
setMainPhoto(photo: Photo) {
  this.userService.setMainPhoto(this.authService.decodeToken.nameid, photo.id).subscribe(() => {
    this.currentMain = this.photos.filter(p => p.isMain === true)[0];
    this.currentMain.isMain = false;
    photo.isMain = true;
    // this.getMemberPhotoChange.emit(photo.url);
    this.authService.changeMemberPhoto(photo.url);
    this.authService.currentUser.photoUrl = photo.url;
    localStorage.setItem('user', JSON.stringify(this.authService.currentUser));
  }, error => {
    this.alertify.error(error);
  });
}
ทดสอบรัน และลองเปลี่ยนภาพโปรไฟล์ จะพบว่าทุกจุดเปลี่ยนเหมือนกันทั้งหมดแล้ว
10. การลบรูปภาพที่อัพโหลด
เพิ่ม API สำหรับลบภาพใน PhotosController.cs
[HttpDelete("{id}")]
public async Task<IActionResult> DeletePhoto(int userId, int id)
{
    if (userId != int.Parse(User.FindFirst(ClaimTypes.NameIdentifier).Value))
        return Unauthorized();

    var user = await _repo.GetUser(userId);

    if (!user.Photos.Any(p => p.Id == id))
        return Unauthorized();

    var photoFromRepo = await _repo.GetPhoto(id);

    if (photoFromRepo.isMain)
        return BadRequest("This is already the main photo");

    if (photoFromRepo.PublicId != null)
    {
        var deleteParams = new DeletionParams(photoFromRepo.PublicId);

        var result = _cloudinary.Destroy(deleteParams);

        if (result.Result == "ok") {
            _repo.Delete(photoFromRepo);
        }
    }

    if (photoFromRepo.PublicId == null)
    {
        _repo.Delete(photoFromRepo);
    }

    if (await _repo.SaveAll())
        return Ok();

    return BadRequest("Failed to delete the photo");
}
เพิ่ม deletePhoto() ใน user.service.ts
deletePhoto(userId: number, id: number) {
  return this.http.delete(this.baseUrl + 'users/' + userId + '/photos/' + id);
}
สร้างฟังก์ชันลบภาพใน photo-editor.component.ts
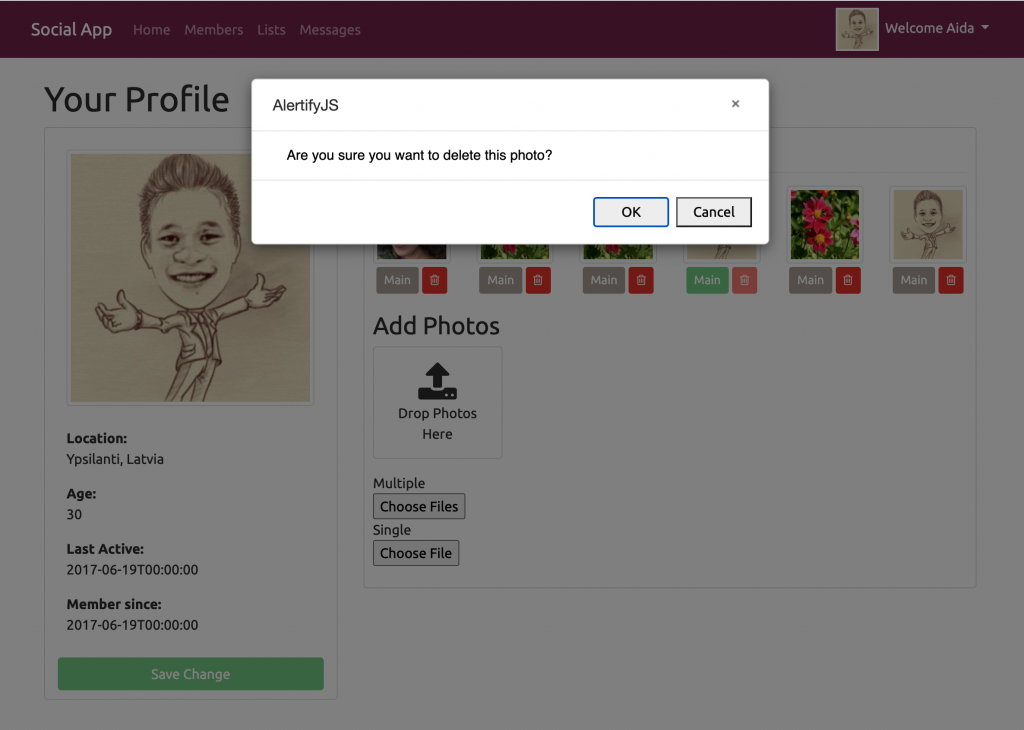
deletePhoto(id: number) {
  this.alertify.confirm("Are you sure you want to delete this photo?", () => {
    this.userService.deletePhoto(this.authService.decodeToken.nameid, id).subscribe(() => {
      this.photos.splice(this.photos.findIndex(p => p.id === id), 1);
      this.alertify.success('Photo has been deleted');
    }, error => {
      this.alertify.error(error);
    });
  });
}
เพิ่ม action click ให้ปุ่มลบภาพใน member-editor.component.html
<button type="button" class="btn btn-sm btn-danger"
(click)="deletePhoto(photo.id)"
[disabled]="photo.isMain"><i class="fa fa-trash-o"></i></button>
ทดลองรันและลบภาพ
โปรดติดตามตอนต่อไป…