สารบัญเนื้อหา
- สร้างโปรเจ็ค Angular ด้วย AngularCLI
- ติดตั้ง Visual Studio Code Extensions
- ทำการ HTTP Request ข้อมูลจาก API
- เพิ่ม CORS Support ให้ API
- แสดงข้อมูลจาก API ในรูปแบบ HTML
- ติดตั้ง Bootstrap และ Font-Awesome
1. สร้างโปรเจ็ค Angular ด้วย AngularCLI
ก่อนสร้างโปรเจค Angular ต้องทำการติดตั้ง Node.JS, NPM แนะนำให้ใช้เวอร์ชั่น LTS (Long Term Support)
จากนั้นทำการติดตั้ง AngularCLI โดยใช้คำสั่ง
npm install -g @angular/cli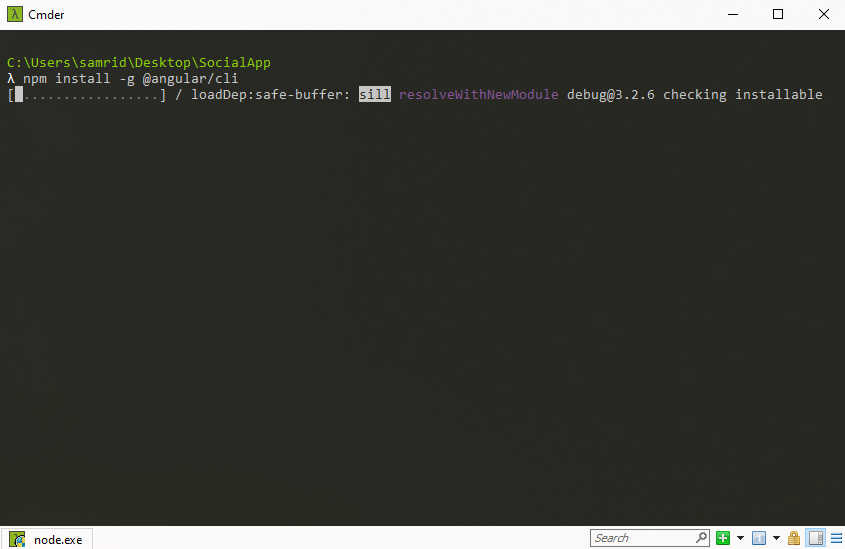

เมื่อติดตั้ง AngularCLI เสร็จแล้ว ให้ทำการสร้างโปรเจ็คโดยใช้คำสั่ง
ng new SocialApp-SPA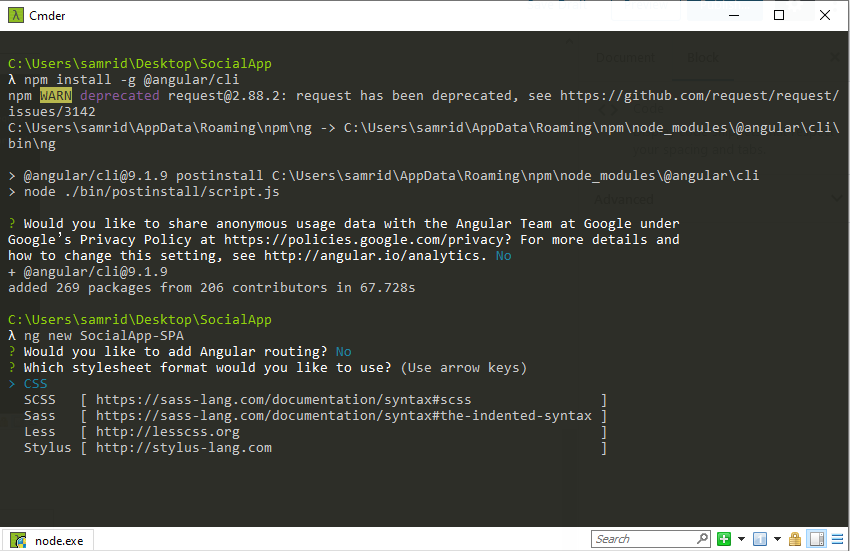
- ไม่ต้อง Add Routing
- เลือก Style Sheet แบบ CSS
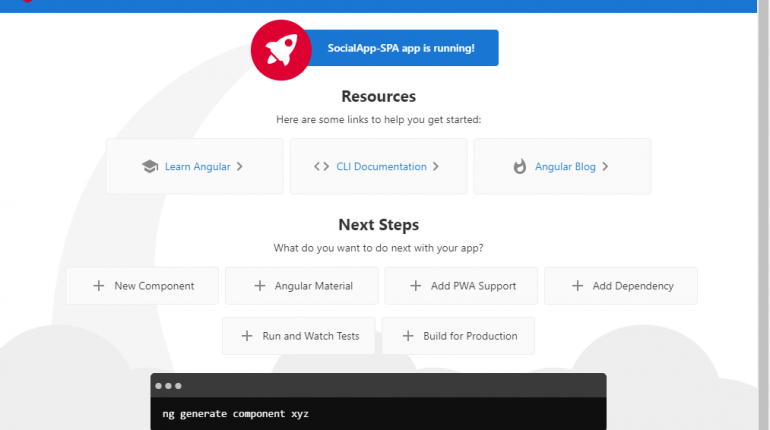
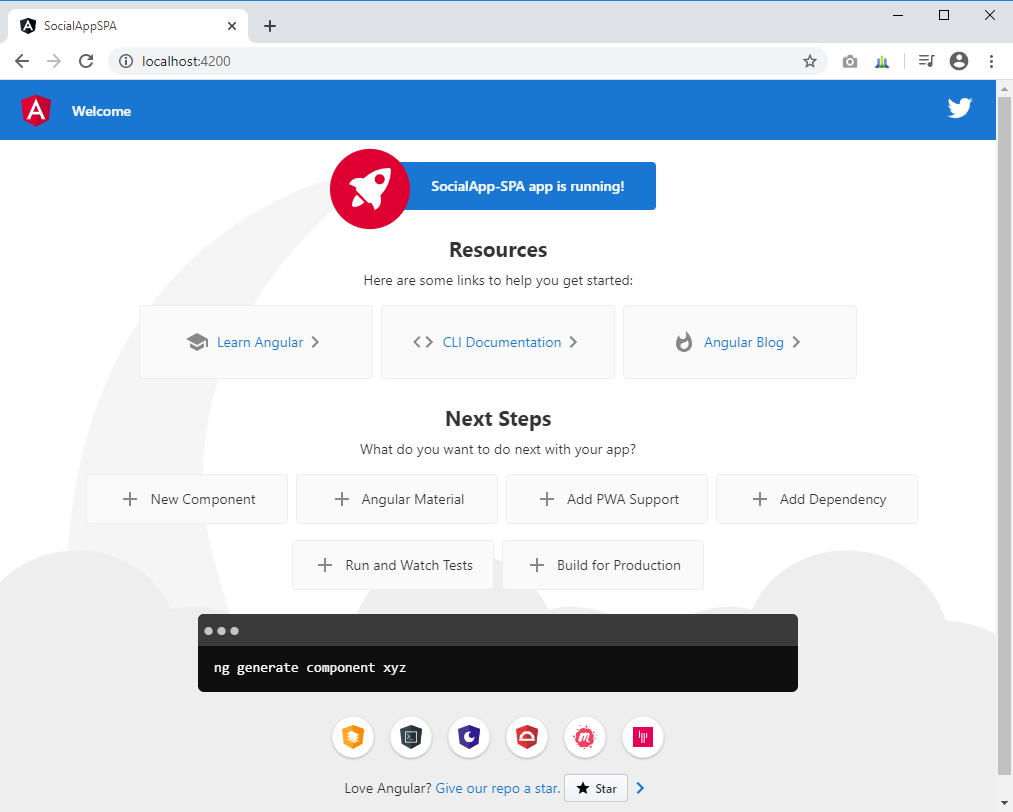
สามารถทำการทดสอบรันได้โดยพิมพ์คำสั่ง
ng serveแล้วทำการเปิด Browser ไปที่ http://localhost:4200
2. ติดตั้ง Visual Studio Code Extensions
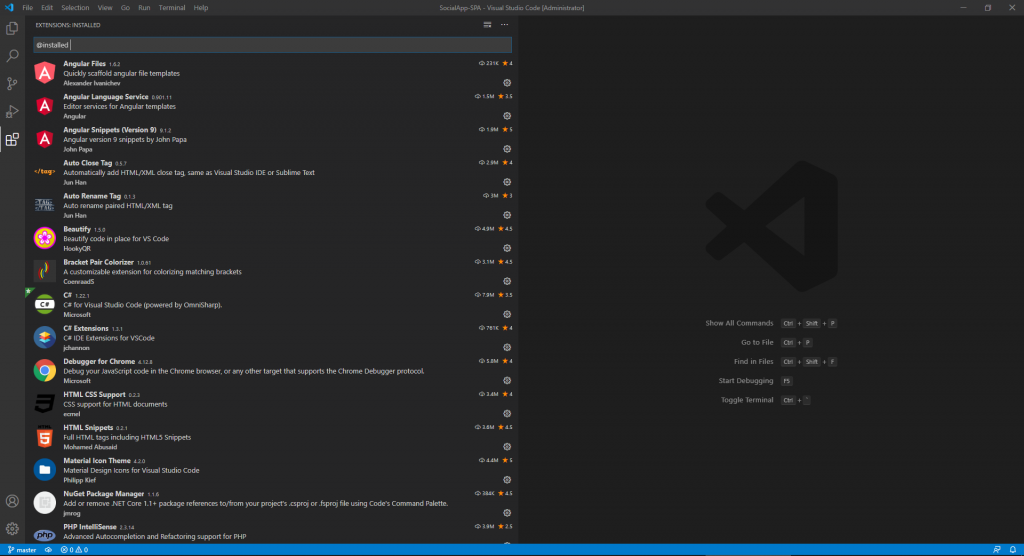
เราจะใช้ Visual Studio Code ในการพัฒนา Application นี้ เราจึงจำเป็นต้องติดตั้ง Visual Studio Code Extensions เบื้องต้น ดังนี้
- Angular Snippets (Version 9)
- Angular Files
- Angular Language Service
- Auto Rename Tag
- Auto Close Tag
- Bracket Pair Colorizer 2
- Debugger for Chrome
- Material Icon Theme
- Prettier – Code formatter
- TSLint
- angular2-switcher
3. ทำการ HTTP Request ข้อมูลจาก API
ทำการสร้าง Value Component ภายใต้ app โดยคลิกขวาที่ app และเลือก Generate Component
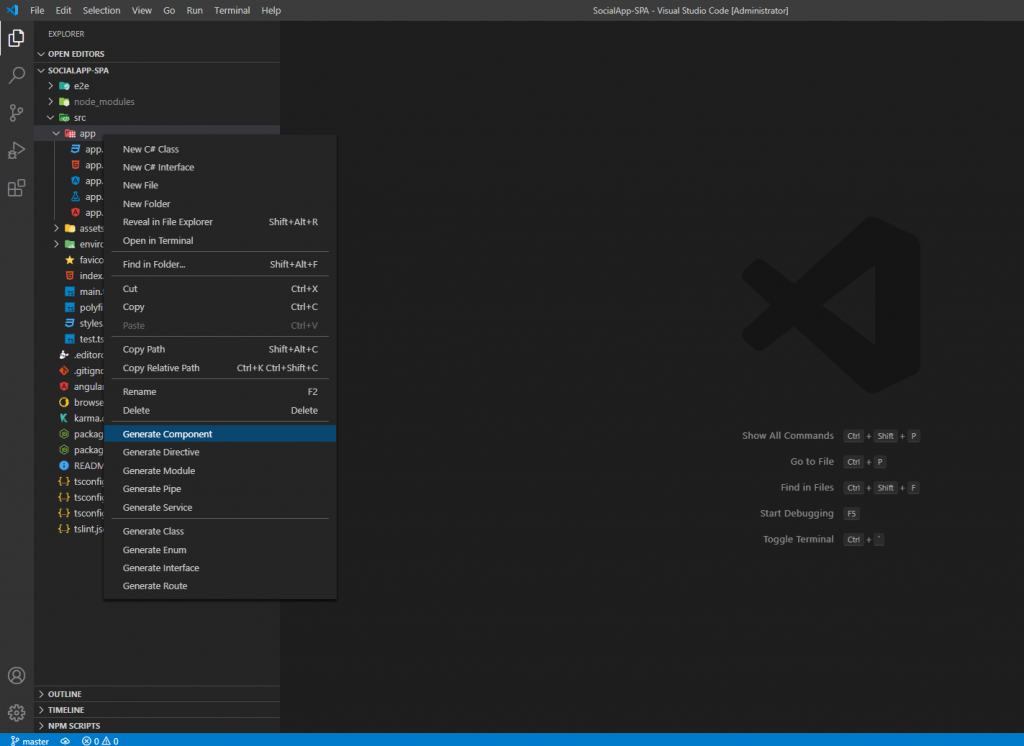

ValueComponent จะถูกเพิ่มเข้าไปใน app.module.ts โดยอัตโนมัติ
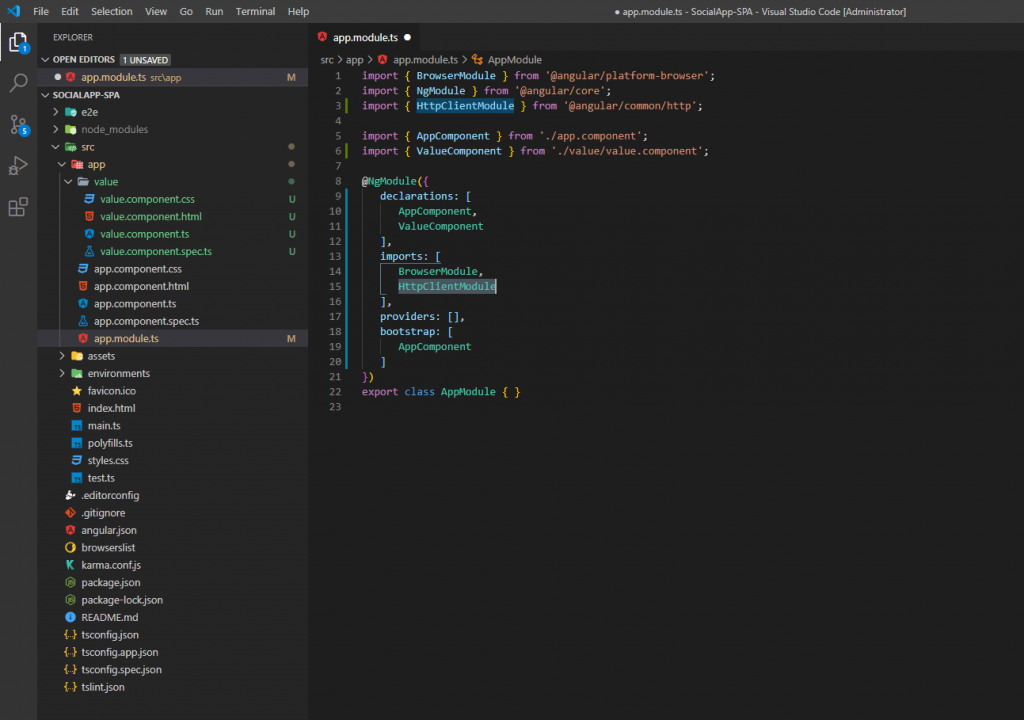
ทำการเพิ่ม Imports => HttpClientModule จาก Package @angular/common/http ใน app.module.ts
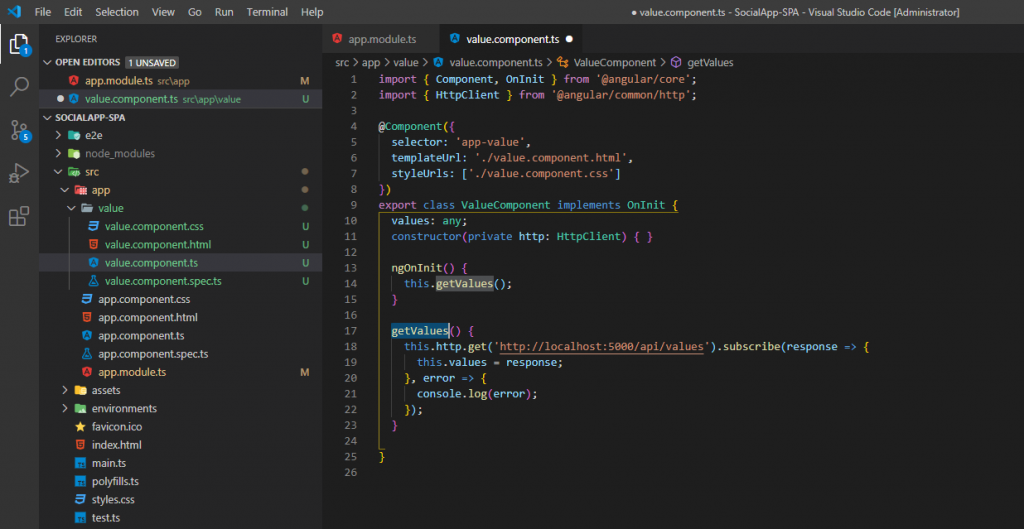
Import HttpClient จาก @angular/common/http และทำการ DI ใน value.component.ts

สร้างฟังก์ชั่นสำหรับดึงข้อมูลจาก API ใน value.component.ts ดังนี้
import { Component, OnInit } from '@angular/core';
import { HttpClient } from '@angular/common/http';

@Component({
  selector: 'app-value',
  templateUrl: './value.component.html',
  styleUrls: ['./value.component.css']
})
export class ValueComponent implements OnInit {
  values: any;
  constructor(private http: HttpClient) { }

  ngOnInit() {
    this.getValues();
  }

  getValues() {
    this.http.get('http://localhost:5000/api/values').subscribe(response => {
      this.values = response;
    }, error => {
      console.log(error);
    });
  }

}
ปรับปรุงโค้ดการแสดงผลใน app.component.html โดยนำเอา app-value หรือ value component ไปแสดง ดังนี้
<div>
  <h1>Welcome</h1>
  <app-value></app-value>
</div>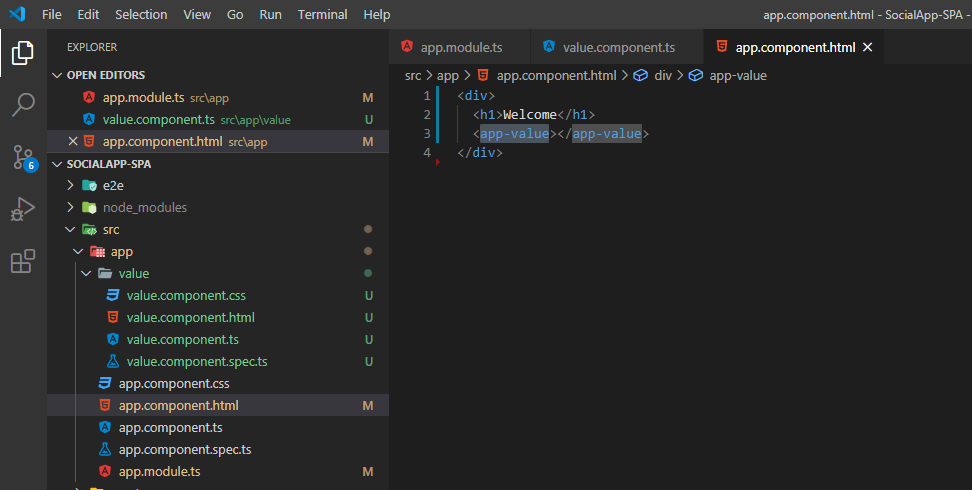
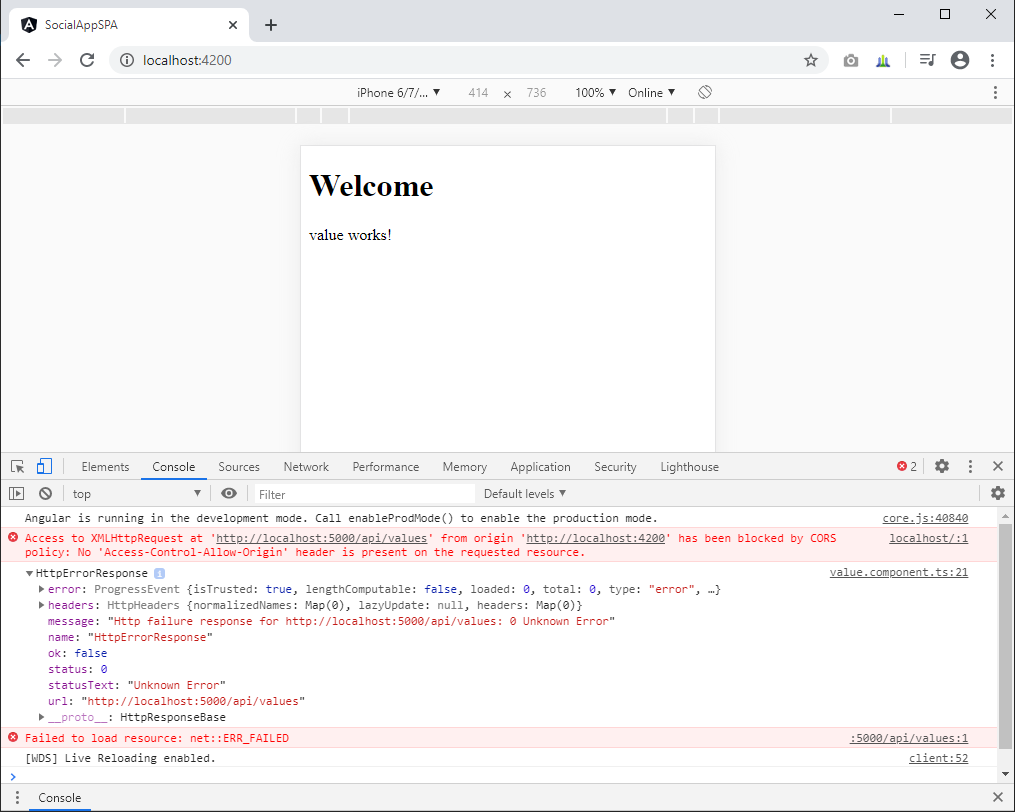
ทดสอบรันและ Inspect ดูในส่วนของ Console จะพบ Error ว่าไม่สามารถเข้าถึงปลายทางได้เนื่องจากถูกบล็อคโดย CORS Policy ดังภาพ
4. เพิ่ม CORS Support ให้ระบบ API
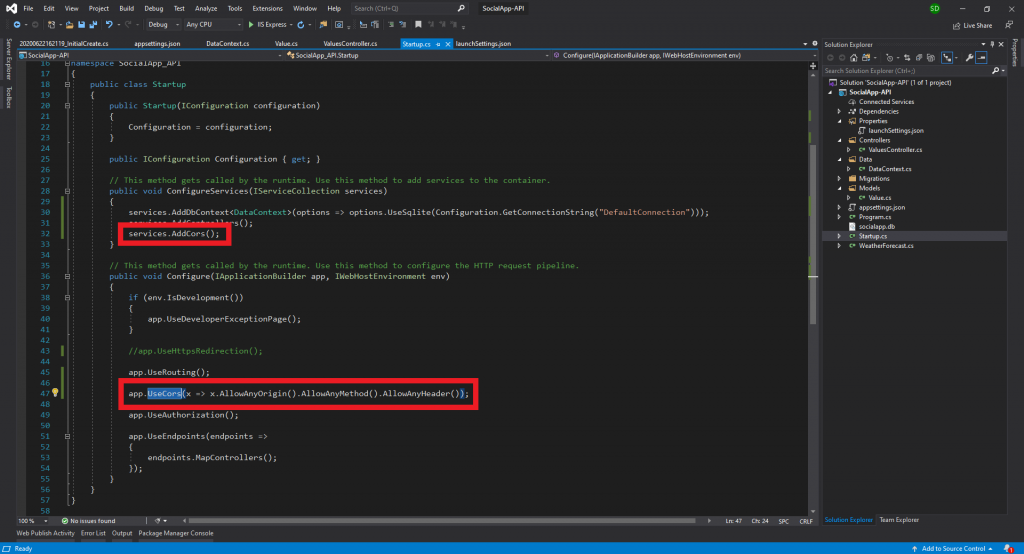
ทำการปรับปรุงไฟล์ Startup.cs ของระบบ API ดังนี้
using System;
using System.Collections.Generic;
using System.Linq;
using System.Threading.Tasks;
using Microsoft.AspNetCore.Builder;
using Microsoft.AspNetCore.Hosting;
using Microsoft.AspNetCore.HttpsPolicy;
using Microsoft.AspNetCore.Mvc;
using Microsoft.EntityFrameworkCore;
using Microsoft.Extensions.Configuration;
using Microsoft.Extensions.DependencyInjection;
using Microsoft.Extensions.Hosting;
using Microsoft.Extensions.Logging;
using SocialApp_API.Data;

namespace SocialApp_API
{
    public class Startup
    {
        public Startup(IConfiguration configuration)
        {
            Configuration = configuration;
        }

        public IConfiguration Configuration { get; }

        // This method gets called by the runtime. Use this method to add services to the container.
        public void ConfigureServices(IServiceCollection services)
        {
            services.AddDbContext<DataContext>(options => options.UseSqlite(Configuration.GetConnectionString("DefaultConnection")));
            services.AddControllers();
            services.AddCors();
        }

        // This method gets called by the runtime. Use this method to configure the HTTP request pipeline.
        public void Configure(IApplicationBuilder app, IWebHostEnvironment env)
        {
            if (env.IsDevelopment())
            {
                app.UseDeveloperExceptionPage();
            }

            //app.UseHttpsRedirection();

            app.UseRouting();

            app.UseCors(x => x.AllowAnyOrigin().AllowAnyMethod().AllowAnyHeader());

            app.UseAuthorization();

            app.UseEndpoints(endpoints =>
            {
                endpoints.MapControllers();
            });
        }
    }
}
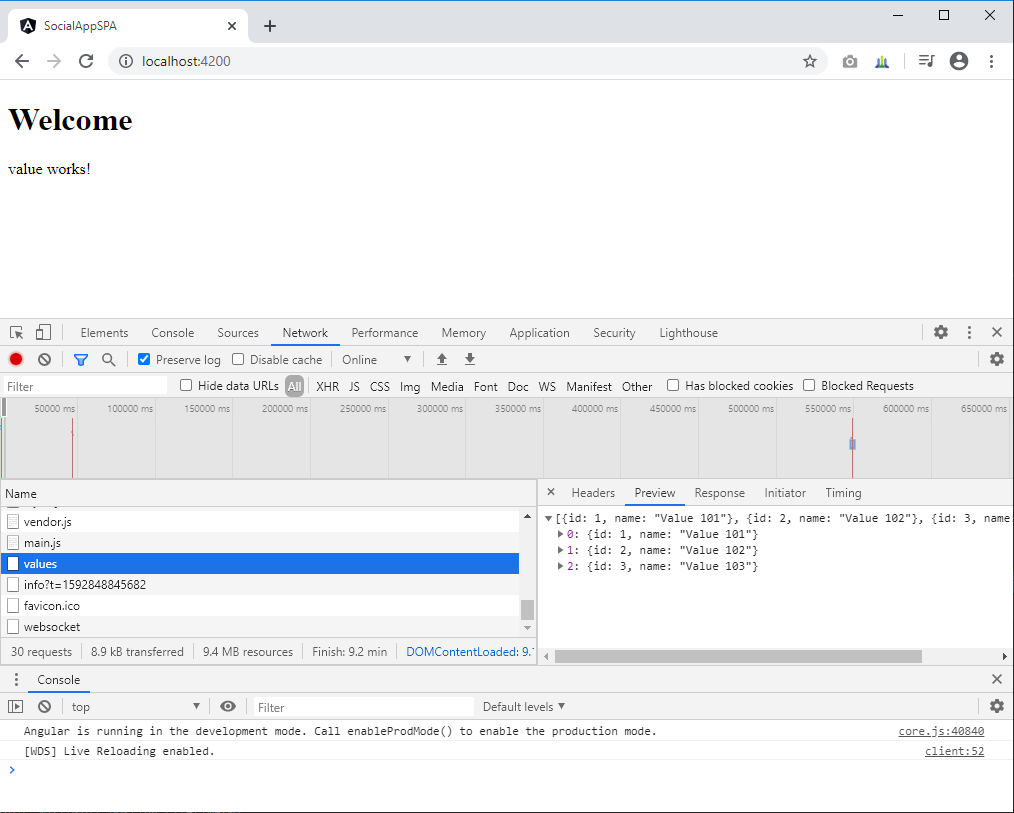
และเมื่อลองรันระบบทั้งคู่ใหม่อีกครั้ง ก็จะเห็นว่าไม่มีการ Error และมีข้อมูลมาแล้ว
5. แสดงข้อมูลจาก API ในรูปแบบ HTML
ทำการ Render ข้อมูลที่ได้ ออกมาแสดงในไฟล์ value.component.html โดยปรับปรุงโค้ด ดังนี้
<p *ngFor="let value of values">
  {{value.id}}, {{value.name}}
</p>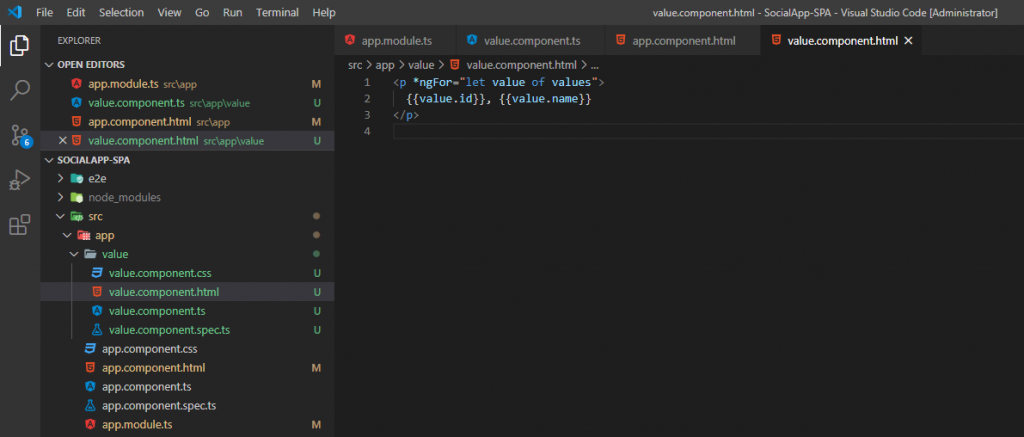
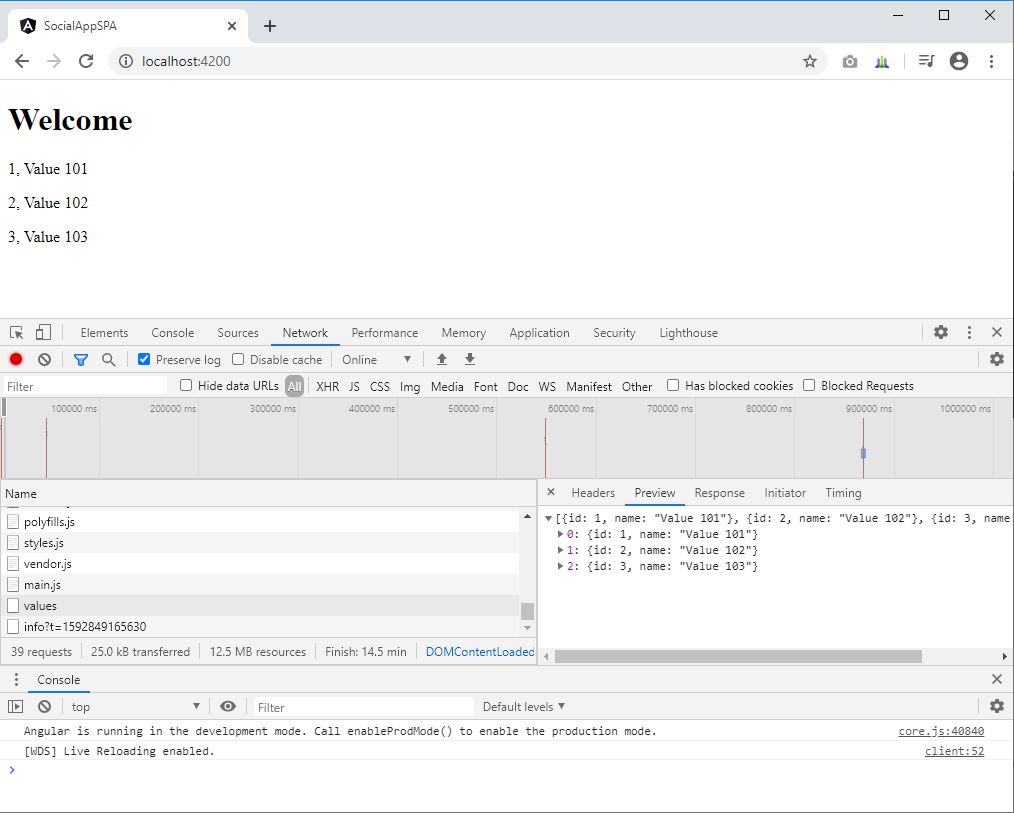
เมื่อตรวจสอบการแสดงผลจะพบข้อมูลถูก Render ออกมา
6. ติดตั้ง Bootstrap และ Font-Awesome
ติดตั้ง Bootstrap และ Font-Awesome เพื่อให้สามารถทำ UI ได้ง่ายขึ้น โดยใช้คำสั่ง
npm install bootstrap font-awesome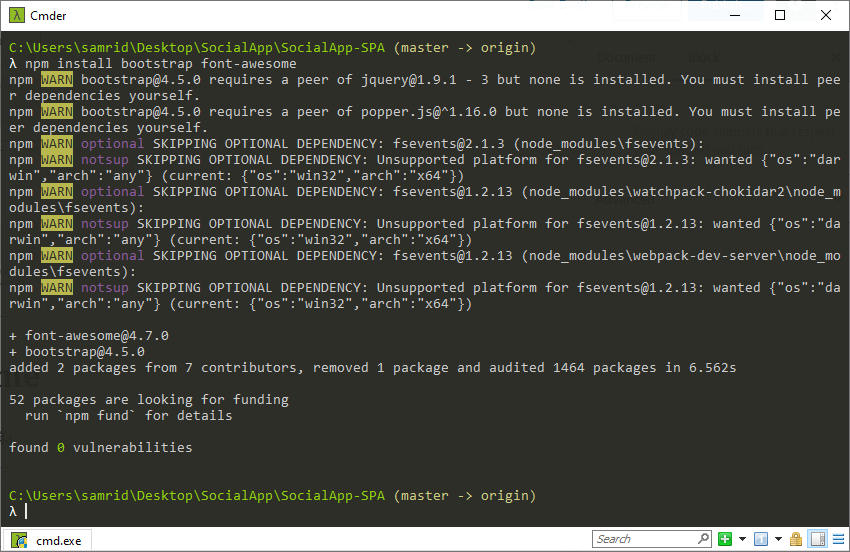
Import Bootstrap, Font-Awesome เข้าไปที่ไฟล์ styles.css
@import '../node_modules/bootstrap/dist/css/bootstrap.min.css';
@import '../node_modules/font-awesome/css/font-awesome.min.css';
จากนั้น HTML ทุกหน้าก็จะสามารถเรียกใช้ Bootstrap, Font-Awesome ได้ทันที
โปรดติดตามตอนต่อไป…
