สารบัญเนื้อหา
- สร้าง Login Form
- ปรับปรุง Login Form โดยใช้ Angular Template Forms
- สร้าง Angular Services (login)
- ใช้งาน Angular Services (login)
- ใช้งาน *ngIf เพื่อแสดง HTML ตามเงื่อนไข
- สร้างระบบการลงทะเบียนสำหรับ User
- การส่งข้อมูลเป็น Input จาก Parent ไปยัง Child
- การส่งข้อมูลเป็น Output จาก Child ไปยัง Parent
- สร้างและใช้งาน Register Service เพื่อลงทะเบียน User
1. สร้าง Login Form
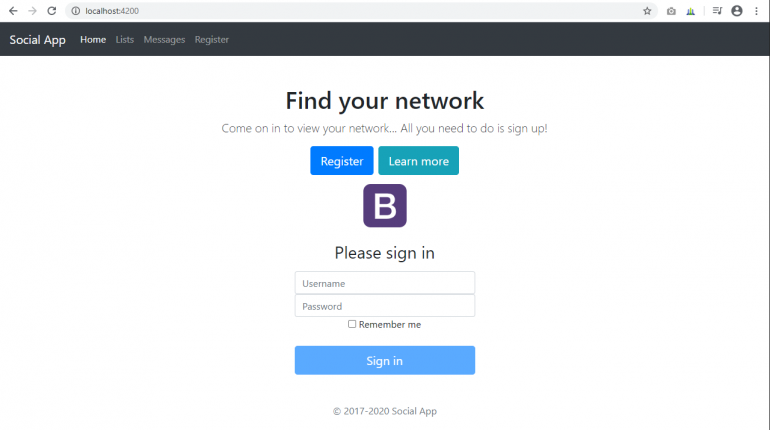
สร้าง Login Form โดยใช้ Bootstrap ซึ่งในที่นี้เราจะสร้าง Nav Component เพื่อใส่ From Login เข้าไปในส่วนบนของ Page
เราจะใช้เทมเพลตตามลิ้งก์นี้ https://getbootstrap.com/docs/4.5/examples/sign-in/
ทำการสร้าง Login Component ใน Angular App และวางเทมเพลต HTML ลงไปใน login.component.html
<div class="text-center">
  <form class="form-signin">
    <img class="mb-4" src="https://getbootstrap.com/docs/4.5/assets/brand/bootstrap-solid.svg" alt="" width="72" height="72">
    <h1 class="h3 mb-3 font-weight-normal">Please sign in</h1>
    <label for="inputUsername" class="sr-only">Username</label>
    <input type="text" id="inputUsername" class="form-control" placeholder="Username" required="" autofocus="">
    <label for="inputPassword" class="sr-only">Password</label>
    <input type="password" id="inputPassword" class="form-control" placeholder="Password" required="">
    <div class="checkbox mb-3">
      <label>
        <input type="checkbox" value="remember-me"> Remember me
      </label>
    </div>
    <button class="btn btn-lg btn-primary btn-block" type="submit">Sign in</button>
    <p class="mt-5 mb-3 text-muted">© 2017-2020 Social App</p>
  </form>
</div>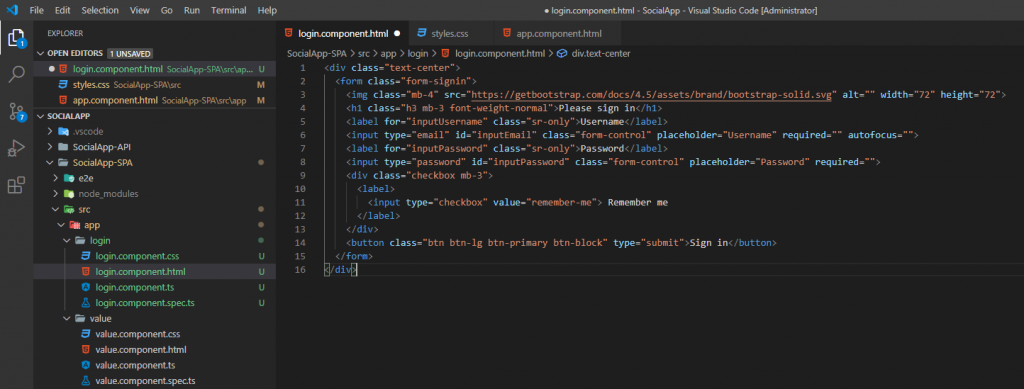
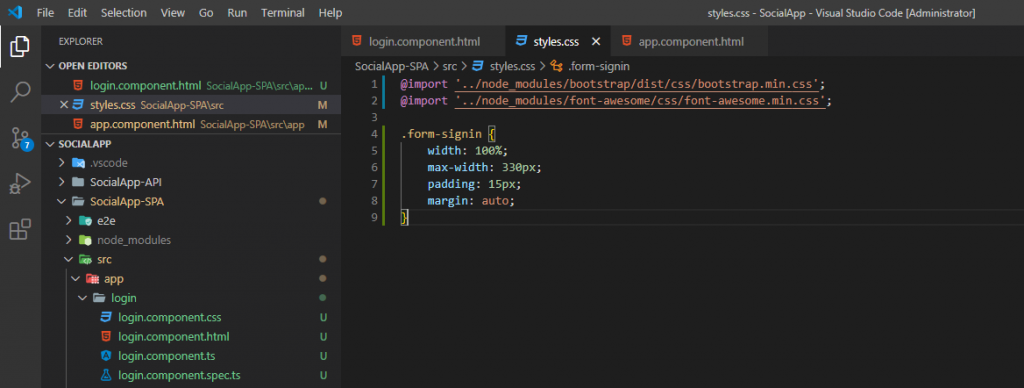
เพิ่ม CSS ใน Styles.css ดังนี้
.form-signin {
    width: 100%;
    max-width: 330px;
    padding: 15px;
    margin: auto;
}
เพิ่ม <app-login></app-login> ใน app.component.html
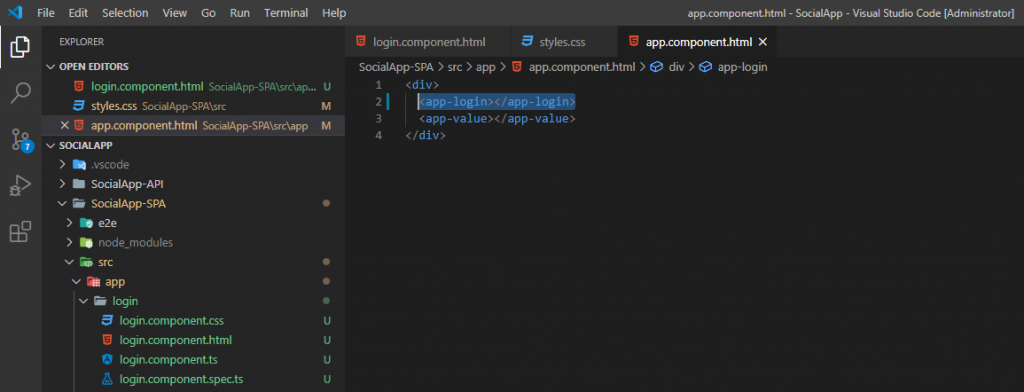
ทดสอบรัน

2. ปรับปรุง Login Form โดยใช้ Angular Template Forms
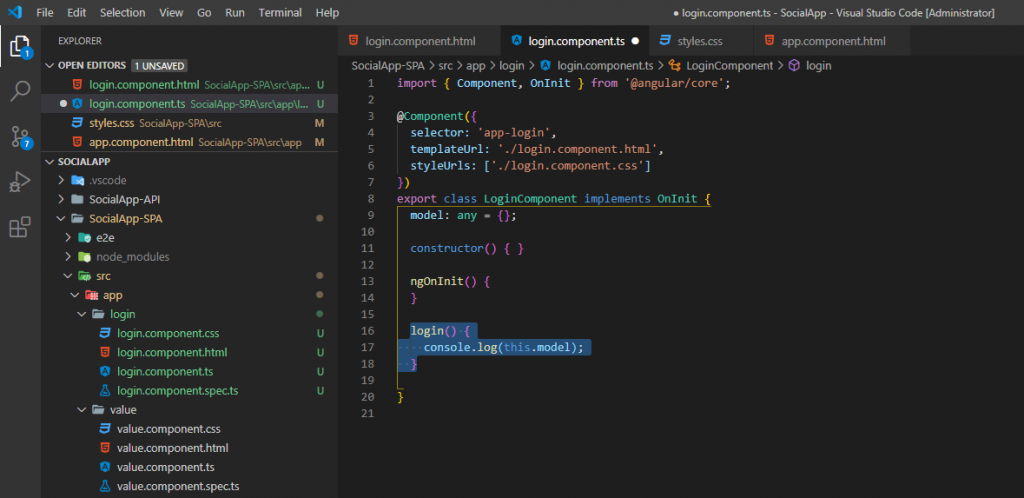
สร้างฟังก์ชันเมื่อกด Submit จาก Login Form ใน login.component.ts ดังนี้
import { Component, OnInit } from '@angular/core';

@Component({
  selector: 'app-login',
  templateUrl: './login.component.html',
  styleUrls: ['./login.component.css']
})
export class LoginComponent implements OnInit {
  model: any = {};

  constructor() { }

  ngOnInit() {
  }

  login() {
    console.log(this.model);
  }

}
เพิ่ม FormsModule ใน imports ของ app.module.ts
import { FormsModule } from '@angular/forms';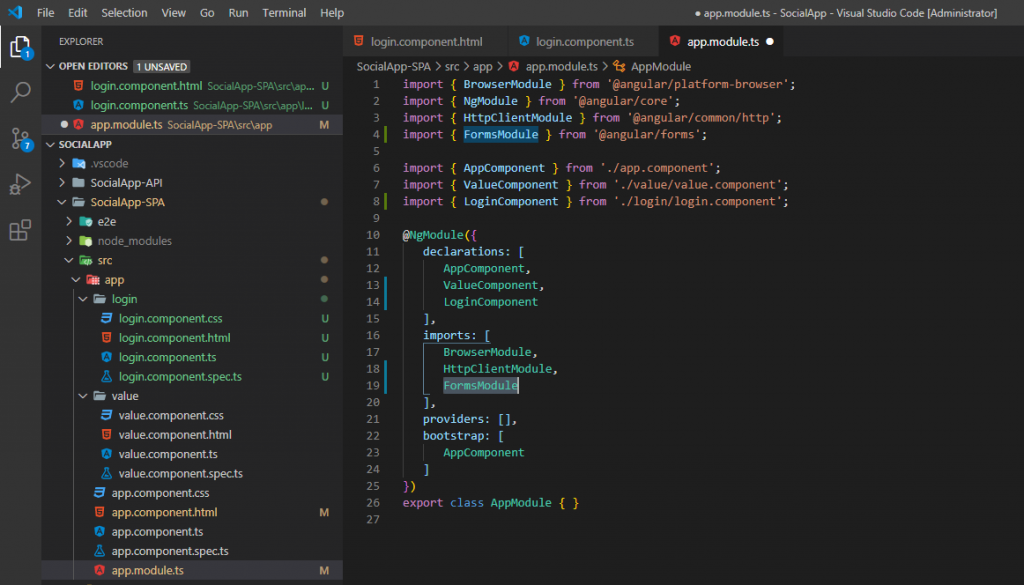
ปรับปรุงโค้ดใน login.component.html ให้ทำงานร่วมกับ Angular Template Form
<div class="text-center">
  <form #loginForm="ngForm" class="form-signin" (ngSubmit)="login()">
    <img class="mb-4" src="https://getbootstrap.com/docs/4.5/assets/brand/bootstrap-solid.svg" alt="" width="72" height="72">
    <h1 class="h3 mb-3 font-weight-normal">Please sign in</h1>
    <label for="inputUsername" class="sr-only">Username</label>
    <input type="text" id="inputUsername" name="inputUsername" class="form-control" placeholder="Username" required autofocus="" [(ngModel)]="model.username">
    <label for="inputPassword" class="sr-only">Password</label>
    <input type="password" id="inputPassword" name="inputPassword" class="form-control" placeholder="Password" required [(ngModel)]="model.password">
    <div class="checkbox mb-3">
      <label>
        <input type="checkbox" value="remember-me"> Remember me
      </label>
    </div>
    <button class="btn btn-lg btn-primary btn-block" type="submit">Sign in</button>
    <p class="mt-5 mb-3 text-muted">© 2017-2020 Social App</p>
  </form>
</div>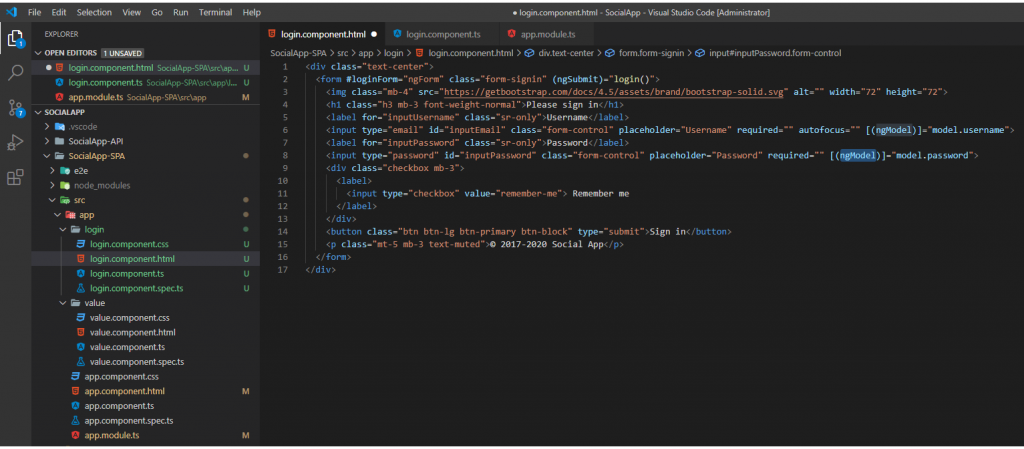
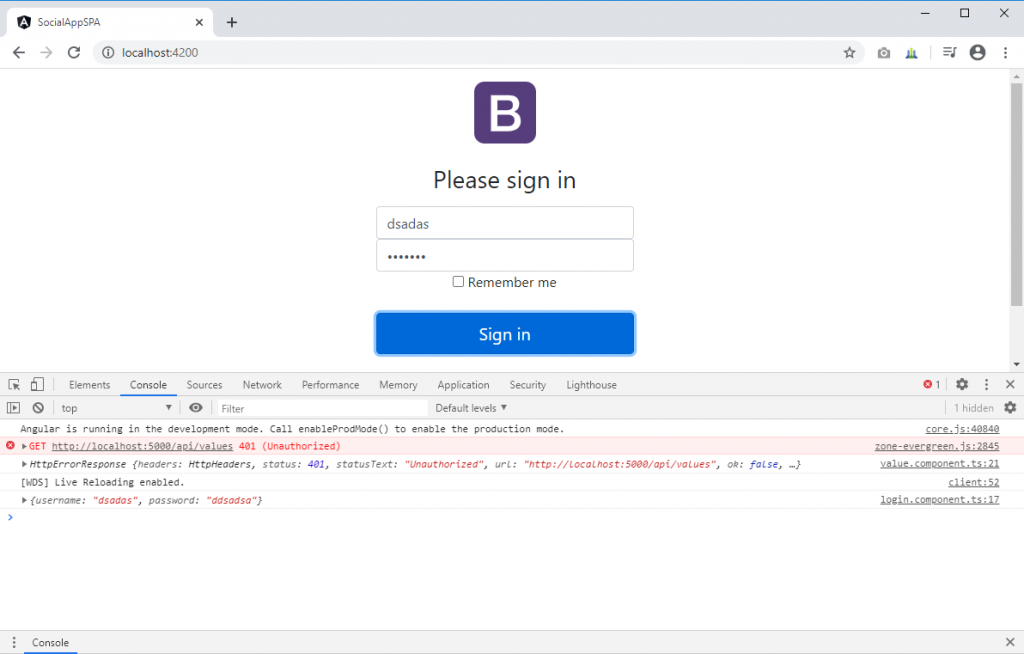
ทดสอบรัน และสังเกตุค่าที่ส่งผ่านเข้ามาทาง Console
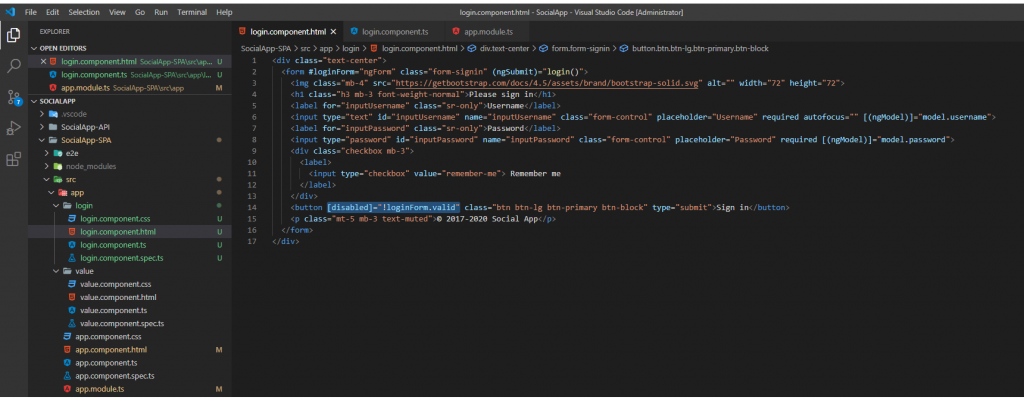
เพิ่ม [disabled]=”!loginForm.valid” ในปุ่ม Submit เพื่อป้องกันไม่ให้กดถ้ากรอกข้อมูลยังไม่ครบ
3. สร้าง Angular Services (login)
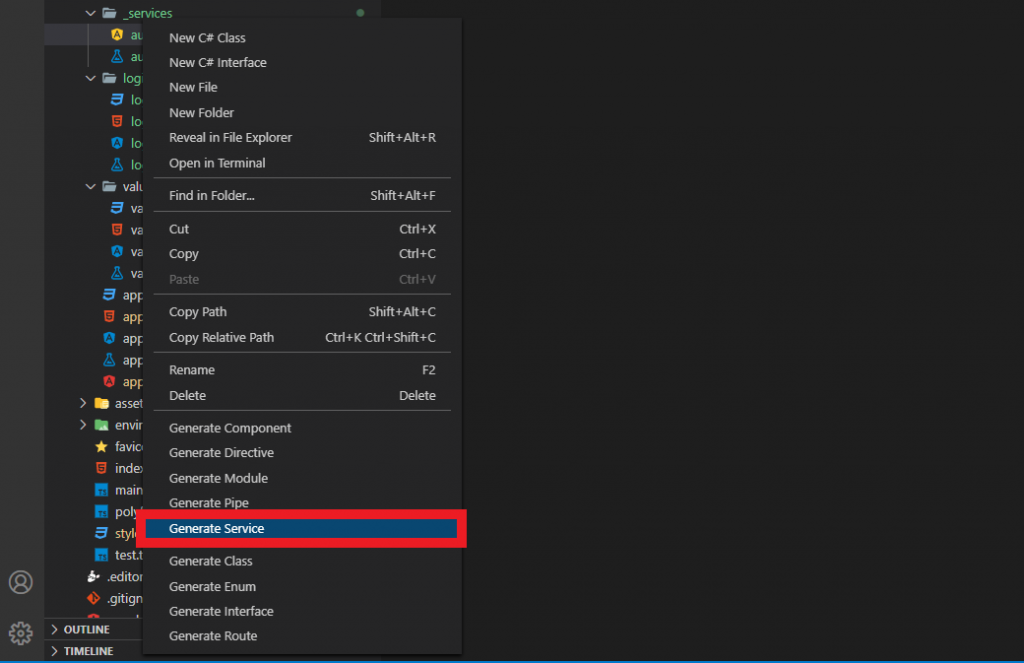
สร้างโฟลเดอร์ _services ภายใต้ app และสร้าง auth service โดยใช้คำสั่ง Generate Service
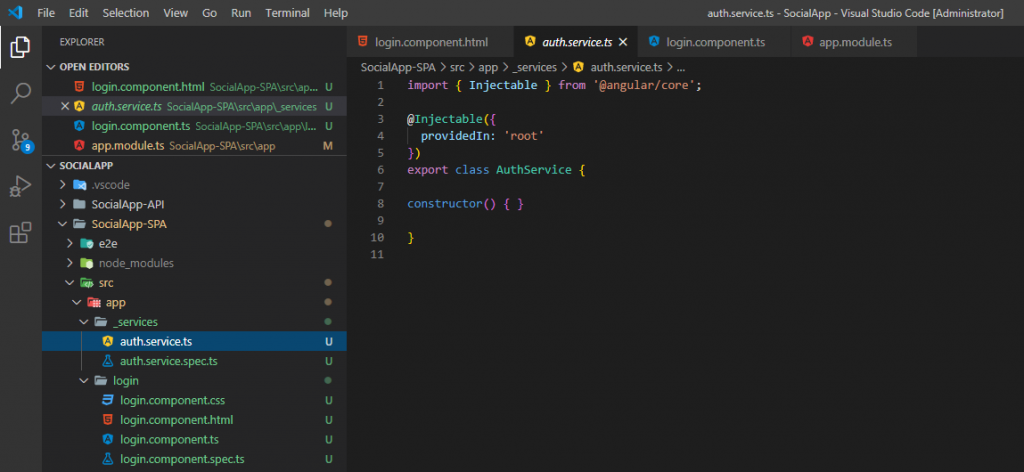
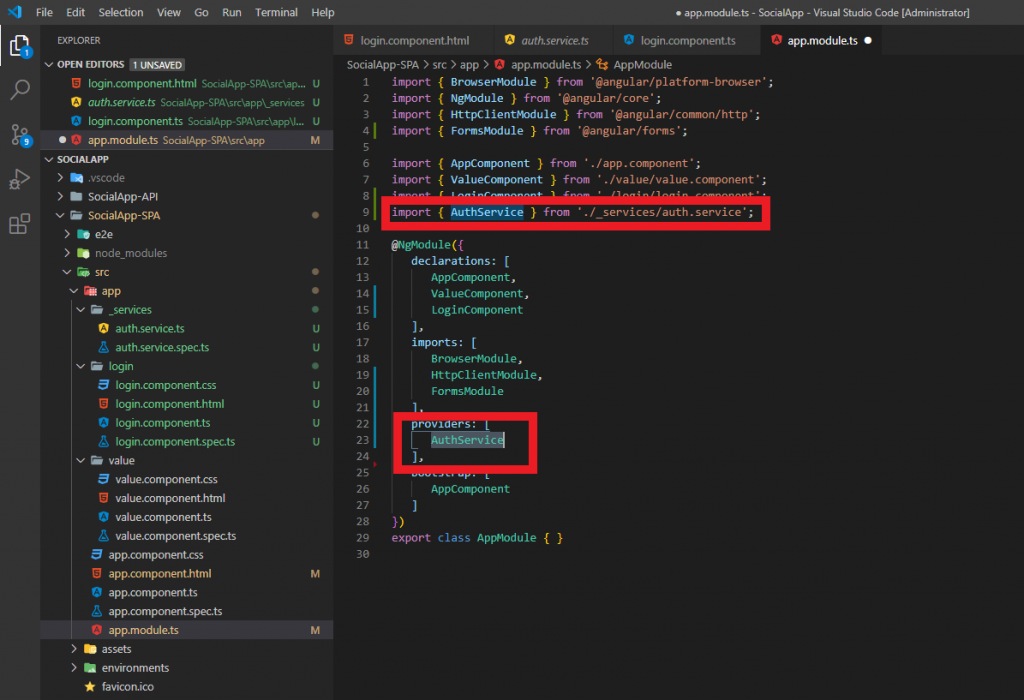
เพิ่ม Service Providers ใน Providers ของ app.module.ts
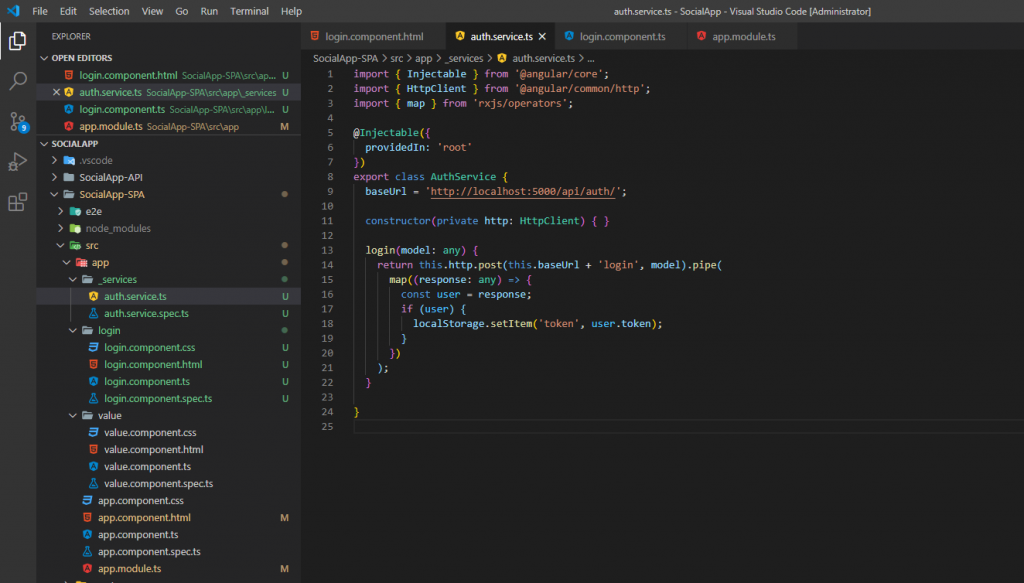
สร้าง Service Logn ใน auth.service.ts
import { Injectable } from '@angular/core';
import { HttpClient } from '@angular/common/http';
import { map } from 'rxjs/operators';

@Injectable({
  providedIn: 'root'
})
export class AuthService {
  baseUrl = 'http://localhost:5000/api/auth/';

  constructor(private http: HttpClient) { }

  login(model: any) {
    return this.http.post(this.baseUrl + 'login', model).pipe(
      map((response: any) => {
        const user = response;
        if (user) {
          localStorage.setItem('token', user.token);
        }
      })
    );
  }

}
4. ใช้งาน Angular Services (login)
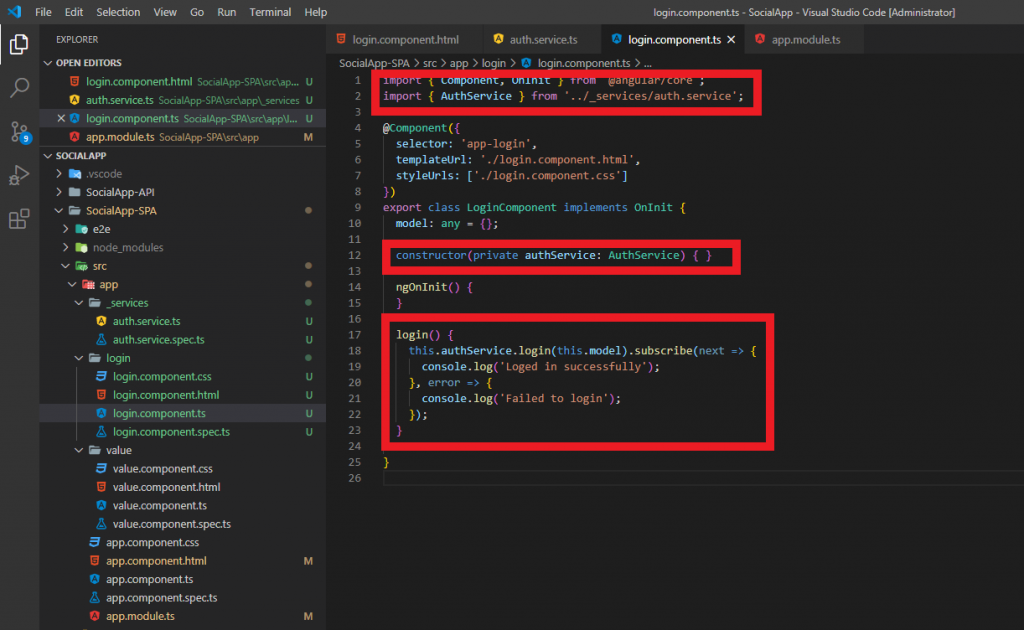
ปรับปรุงโค้ดใน login.component.ts เพื่อเรียกใช้งาน Auth Service
import { Component, OnInit } from '@angular/core';
import { AuthService } from '../_services/auth.service';

@Component({
  selector: 'app-login',
  templateUrl: './login.component.html',
  styleUrls: ['./login.component.css']
})
export class LoginComponent implements OnInit {
  model: any = {};

  constructor(private authService: AuthService) { }

  ngOnInit() {
  }

  login() {
    this.authService.login(this.model).subscribe(next => {
      console.log('Loged in successfully');
    }, error => {
      console.log('Failed to login');
    });
  }

}
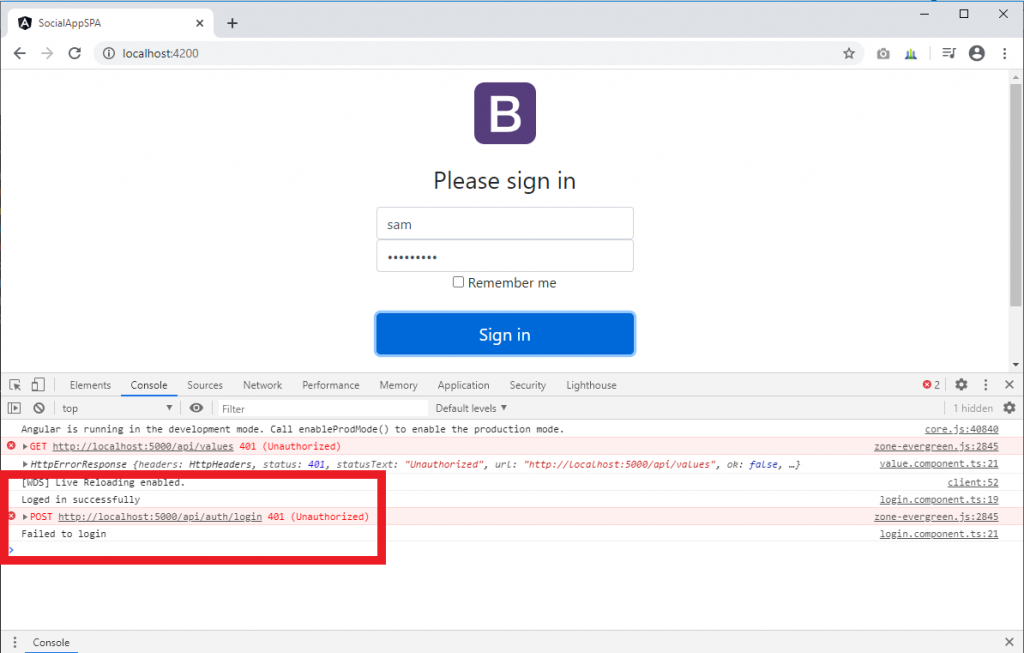
ทดลองรัน และทำการ Login
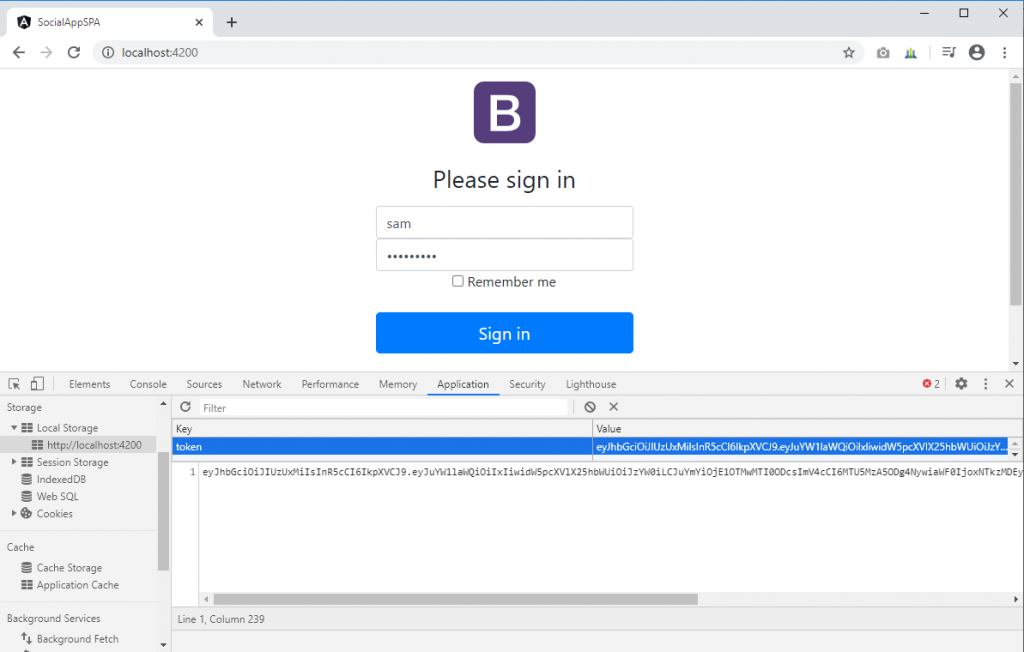
และถ้า Login สำเร็จ token จะถูกเก็บไว้ที่ Local Storage
5. ใช้งาน *ngIf เพื่อแสดง HTML ตามเงื่อนไข
เพิ่ม nav component เพื่อแสดงเมนูด้านบนของ Social App และเขียนโค้ด html ใน nav.component.html
<nav class="navbar navbar-expand-md navbar-dark bg-dark">
  <a class="navbar-brand" href="#">Social App</a>
  <button class="navbar-toggler" type="button" data-toggle="collapse" data-target="#navbarsExampleDefault" aria-controls="navbarsExampleDefault" aria-expanded="false" aria-label="Toggle navigation">
    <span class="navbar-toggler-icon"></span>
  </button>

  <div class="collapse navbar-collapse" id="navbarsExampleDefault">
    <ul class="navbar-nav mr-auto">
      <li class="nav-item active">
        <a class="nav-link" href="#">Home <span class="sr-only">(current)</span></a>
      </li>
      <li class="nav-item">
        <a class="nav-link" href="#">Lists</a>
      </li>
      <li class="nav-item">
        <a class="nav-link" href="#">Messages</a>
      </li>
      <li class="nav-item">
        <a class="nav-link" href="#">Register</a>
      </li>
      <li class="nav-item">
        <a class="nav-link" href="#">Logout</a>
      </li>
    </ul>

    <div class="dropdown">
      <a class="dropdown-toggle text-light">
        Welcome User
      </a>

      <div class="dropdown-menu">
        <a href="#" class="dropdown-item"><i class="fa fa-user"></i> Edit Profile</a>
        <div class="dropdown-divider"></div>
        <a href="#" class="dropdown-item"><i class="fa fa-sign-out"></i> Logout</a>
      </div>
    </div>

  </div>
</nav>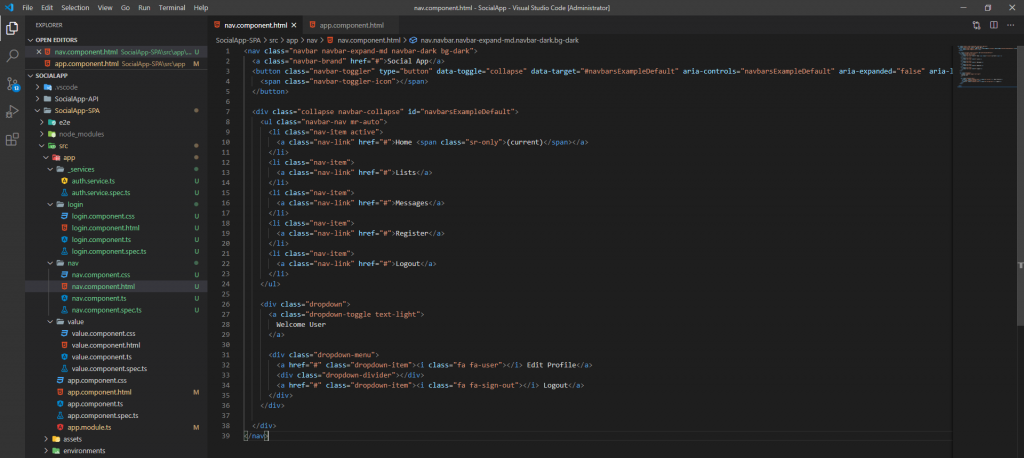
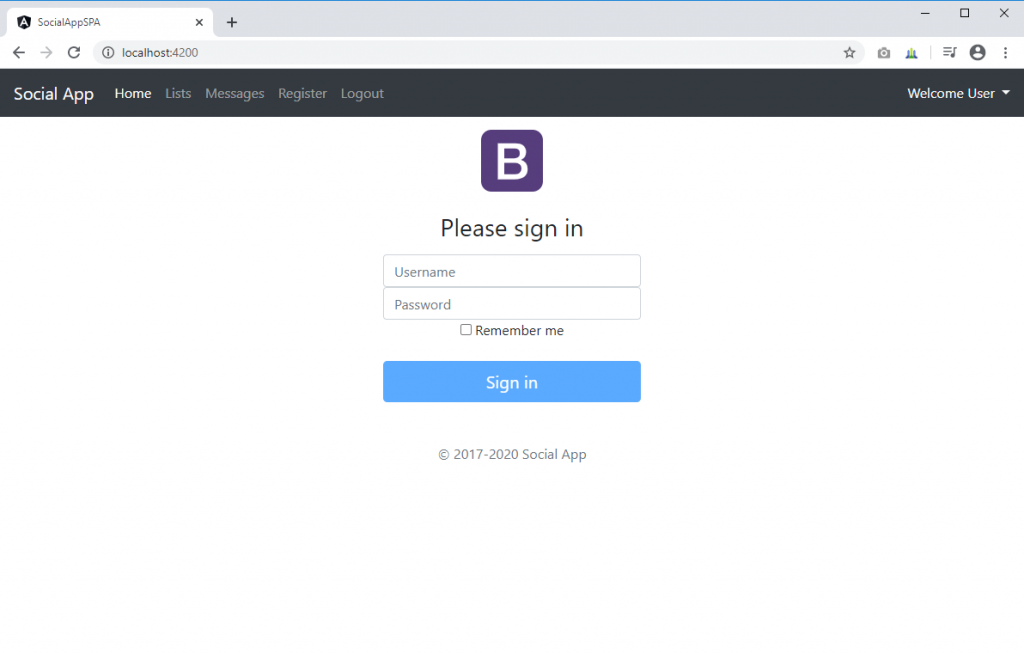
และเพิ่ม <app-nav></app-nav> ที่บนสุดของ app.component.html จะได้หน้าตาของ Social App ดังนี้
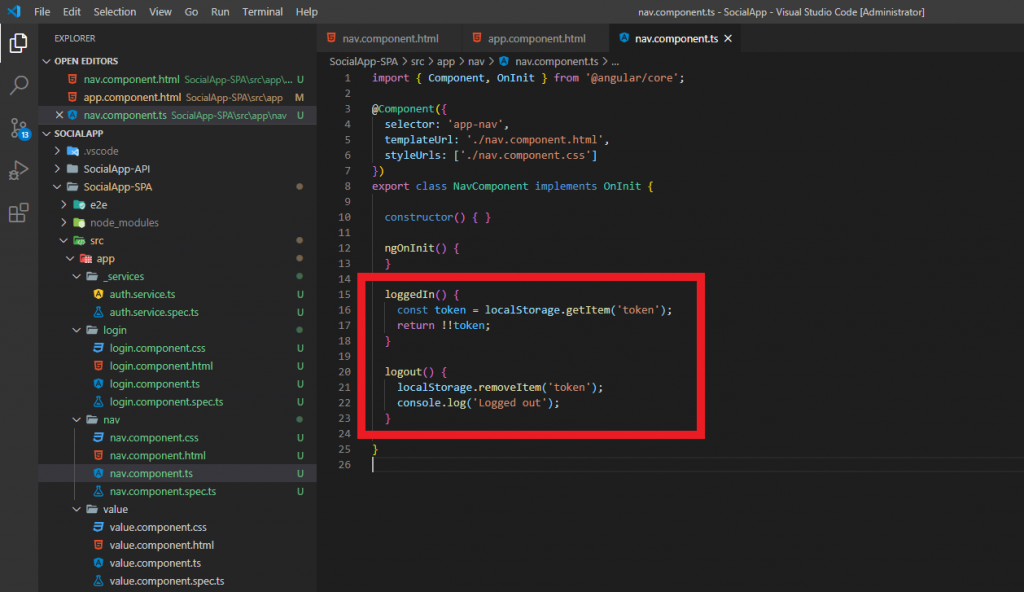
เขียนฟังก์ชันตรวจสอบสถานะการ login ใน nav.component.ts
loggedIn() {
    const token = localStorage.getItem('token');
    return !!token;
}
เขียนโค้ดสำหรับการ Logout ใน nav.component.ts
logout() {
    localStorage.removeItem('token');
    console.log('Logged out');
}
ในส่วนของ html ของ nav ใส่ *ngIf=”loggedIn()” หากต้องการให้ส่วนนั้นแสดงเมื่อทำการ login สำเร็จแล้ว และใส่ *ngIf=”!loggedIn()” หากต้องการให้ส่วนนั้นแสดงเมื่อยังไม่ login
<nav class="navbar navbar-expand-md navbar-dark bg-dark">
  <a class="navbar-brand" href="#">Social App</a>
  <button class="navbar-toggler" type="button" data-toggle="collapse" data-target="#navbarsExampleDefault" aria-controls="navbarsExampleDefault" aria-expanded="false" aria-label="Toggle navigation">
    <span class="navbar-toggler-icon"></span>
  </button>

  <div class="collapse navbar-collapse" id="navbarsExampleDefault">
    <ul class="navbar-nav mr-auto">
      <li class="nav-item active">
        <a class="nav-link" href="#">Home <span class="sr-only">(current)</span></a>
      </li>
      <li class="nav-item">
        <a class="nav-link" href="#">Lists</a>
      </li>
      <li class="nav-item">
        <a class="nav-link" href="#">Messages</a>
      </li>
      <li *ngIf="!loggedIn()" class="nav-item">
        <a class="nav-link" href="#">Register</a>
      </li>
      <li *ngIf="loggedIn()" class="nav-item">
        <a class="nav-link" (click)="logout()">Logout</a>
      </li>
    </ul>

    <div *ngIf="loggedIn()" class="dropdown">
      <a class="dropdown-toggle text-light">
        Welcome User
      </a>

      <div class="dropdown-menu">
        <a href="#" class="dropdown-item"><i class="fa fa-user"></i> Edit Profile</a>
        <div class="dropdown-divider"></div>
        <a href="#" class="dropdown-item"><i class="fa fa-sign-out"></i> Logout</a>
      </div>
    </div>

  </div>
</nav>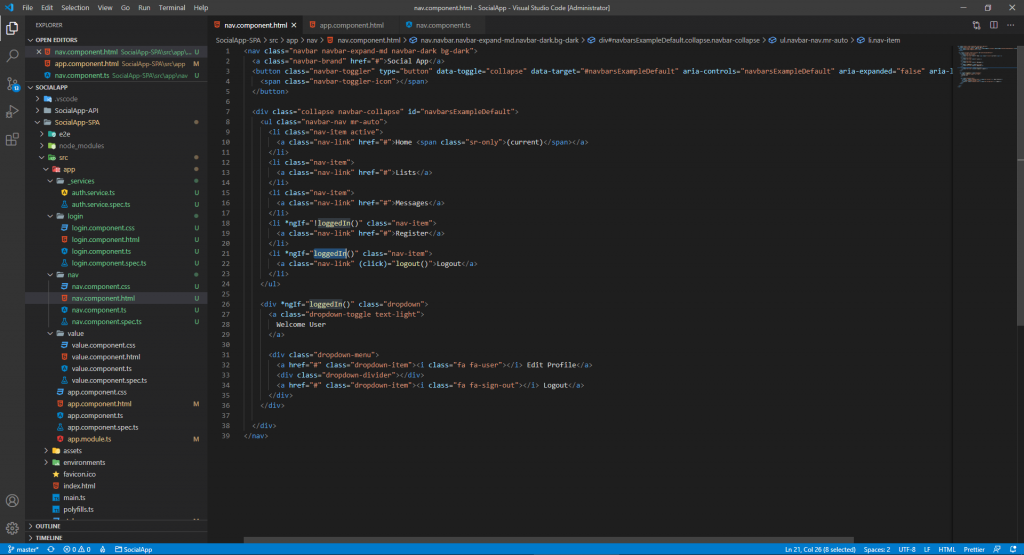
ทดสอบการทำงานเมื่อ login และไม่ login
ย้ายฟังก์ชันตรวจสอบสถานะการ login และฟังชันการ logout ใน nav.component.ts ไปไว้ใน auth.service.ts
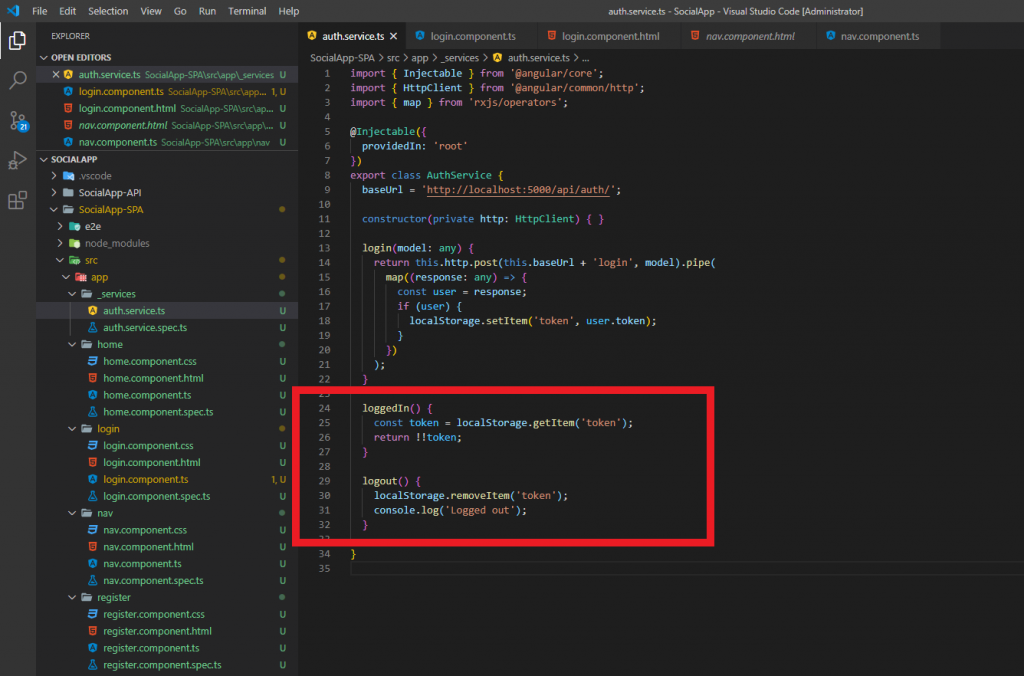
ปรับปรุงโค้ดใน nav.component.ts ไปเรียก service แทน
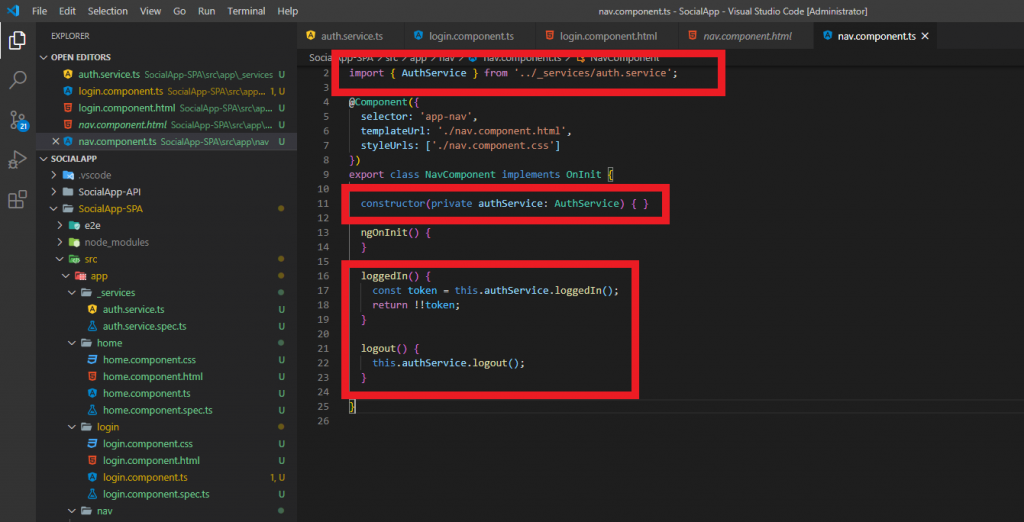
เพิ่มการเรียกฟังก์ชันตรวจสอบการ login ใน login.component.ts
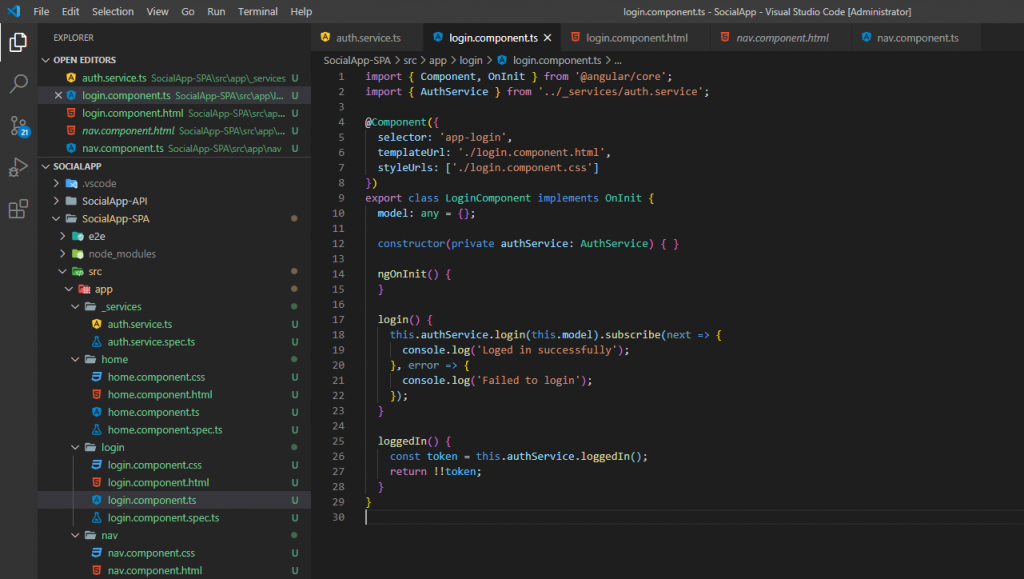
เพิ่ม *ngIf=”!loggedIn()” ใน login.component.html

ทดสอบการแสดงผลเมื่อ login และไม่ login อีกครั้ง
6. สร้างระบบการลงทะเบียนสำหรับ User
สร้าง home component และ register component โดยมี code ดังนี้
register.component.ts
import { Component, OnInit } from '@angular/core';

@Component({
  selector: 'app-register',
  templateUrl: './register.component.html',
  styleUrls: ['./register.component.css']
})
export class RegisterComponent implements OnInit {
  model: any = {};

  constructor() { }

  ngOnInit() {
  }

  register() {
    console.log(this.model);
  }

  cancel() {
    console.log('Cancelled');
  }
}
register.component.html
<form #registerForm="ngForm" (ngSubmit)="register()">
  <h2 class="text-center text-primary mt-2">Sign Up</h2>
  <hr>

  <div class="form-group">
    <input type="text" class="form-control" required name="username" [(ngModel)]="model.username" placeholder="Username">
  </div>

  <div class="form-group">
    <input type="password" class="form-control" required name="password" [(ngModel)]="model.password" placeholder="Password">
  </div>

  <div class="form-group text-center">
    <button class="btn btn-success" type="submit">Register</button>
    <button class="btn btn-default" type="button" (click)="cancel()">Cancel</button>
  </div>

</form>
home.component.ts
import { Component, OnInit } from '@angular/core';

@Component({
  selector: 'app-home',
  templateUrl: './home.component.html',
  styleUrls: ['./home.component.css']
})
export class HomeComponent implements OnInit {
  registerMode = false;

  constructor() { }

  ngOnInit() {
  }

  registerToggle() {
    this.registerMode = !this.registerMode;
  }

}
home.component.html
<div class="container mt-5">
  <div *ngIf="!registerMode" class="text-center">
    <h1>Find your network</h1>
    <p class="lead">Come on in to view your network... All you need to do is sign up!</p>
    <div class="text-center">
      <button class="btn btn-primary btn-lg mr-2" (click)="registerToggle()">Register</button>
      <button class="btn btn-info btn-lg">Learn more</button>
    </div>
  </div>

  <div *ngIf="registerMode" class="container">
    <div class="row justify-content-center">
      <div class="col-4">
        <app-register></app-register>
      </div>
    </div>
  </div>
</div>
ทดสอบรัน และดูผลการแสดงผล และ Console
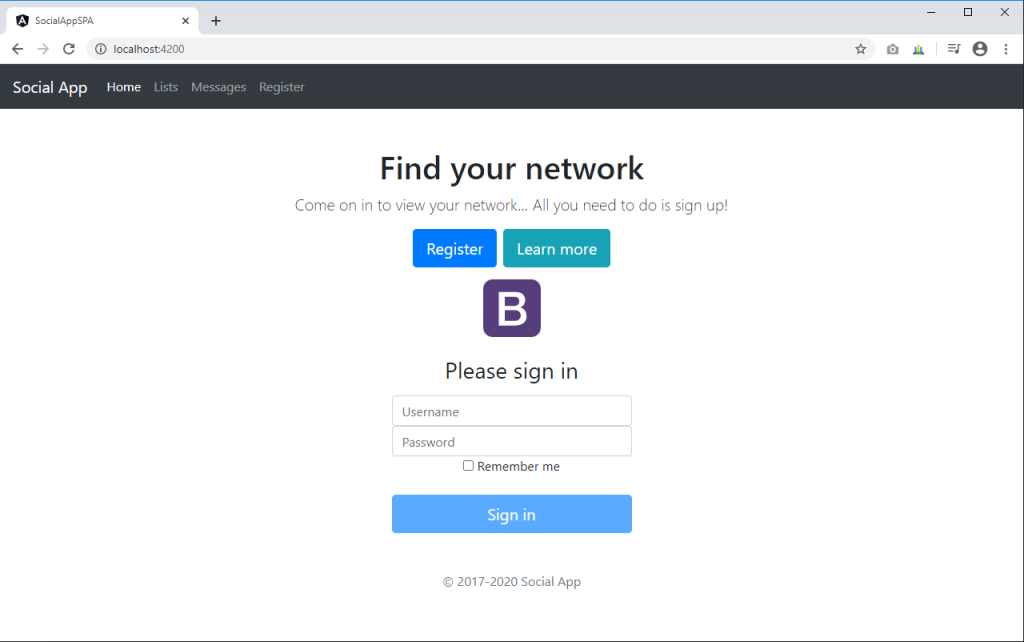
7. การส่งข้อมูลเป็น Input จาก Parent ไปยัง Child
ตอนนี้ Home กับ Register มีความสัมพันธ์กัน โดย Home เป็น Parent ของ Register และ Register เป็น Child ของ Home
เราจะทำการส่งข้อมูลเป็น Input จาก Home ไปยัง Register ซึ่งเป็นการส่งข้อมูลจาก Parent ไปยัง Child
ทำการ [AllowAnonymous] ใน API เพื่อให้สามารถเรียกข้อมูลได้ก่อน

ย้ายการทำงานเรียกข้อมูลจาก Value Component ไปที่ Home Component แล้วลบ Value Component ทิ้งไป

เพิ่ม Input ใน register.component.ts

ส่งค่า Input จาก Parent Home

แสดงค่า Input Value ที่ได้รับบน Register
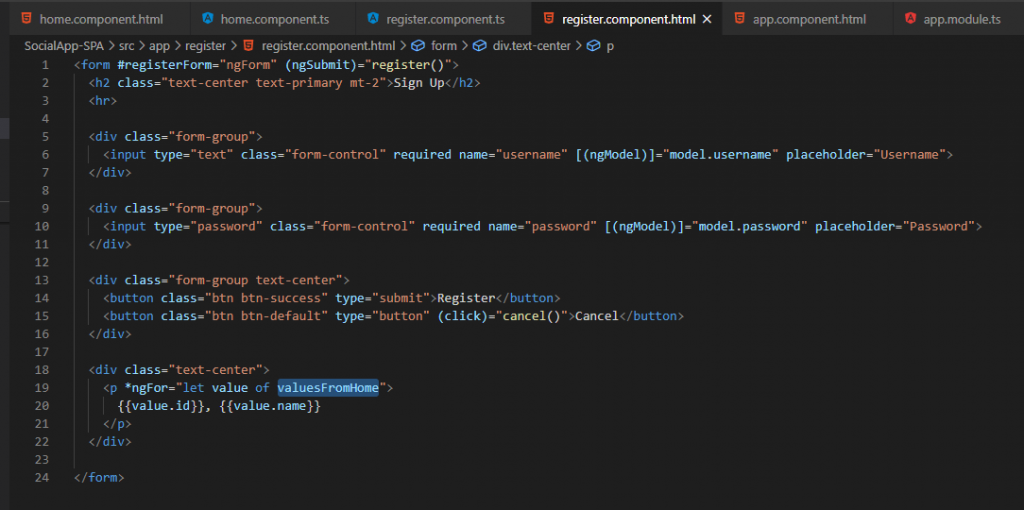
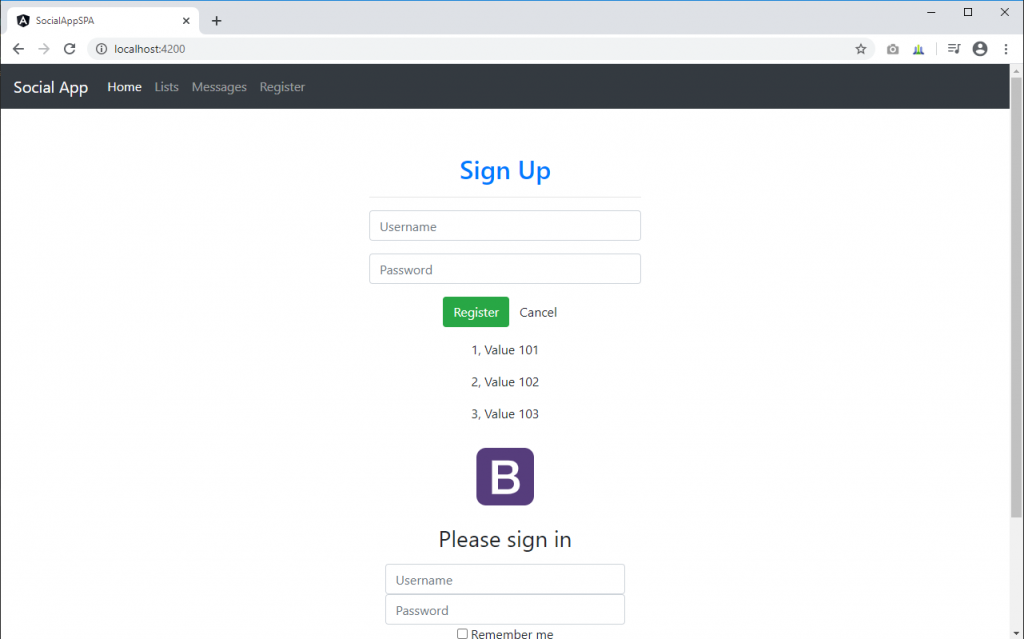
ลบการแสดงผล Value และส่วนที่เกี่ยวข้องออกทั้งหมด จะได้ไม่มีผลต่อหน้าจอ ก่อนไปหัวข้อถัดไป

8. การส่งข้อมูลเป็น Output จาก Child ไปยัง Parent
เราจะทำการส่งข้อมูลเป็น Output จาก Register ไปยัง Home ซึ่งเป็นการส่งข้อมูลจาก Child ไปยัง Parent
เพิ่ม Output ข้อมูลที่ต้องการส่งใน register.component.ts

สร้างฟังก์ชั่นเพื่อรับค่า Output จาก register ใน home.component.ts

เชื่อมโยงการส่งข้อมูลจาก register

ทดสอบรัน จะพบว่าสามารถกด Cancel Register เพื่อเปลี่ยนการแสดงผลได้แล้ว
9. สร้างและใช้งาน Register Service เพื่อลงทะเบียน User
สร้าง Register Service ใน auth.service.ts

เรียกใช้งาน Register Service จาก register.component.ts

โปรดติดตามตอนต่อไป…
